Author: mumariqbal191@gmail.com

  • How to use AI to generate high-retention short-form scripts (2026 Viral Creator Guide)

    How to use AI to generate high-retention short-form scripts (2026 Viral Creator Guide)

    If you’ve ever posted a video that looked good but still flopped, the problem usually isn’t editing.

    It’s the script.

    In 2026, short-form content success is no longer about just visuals. Platforms like TikTok, Instagram Reels, and YouTube Shorts are aggressively optimizing for watch time, retention curves, and hook strength in the first 1.5 seconds.

    And here’s the game-changer:

    You can now use AI to generate high-retention short-form scripts that are specifically engineered for virality.

    Look, I’ve spent years breaking down viral content patterns frame-by-frame, and I can tell you this with confidence:
    Editing gets attention, but scripting controls retention.

    Let’s break it down like a professional VFX and content strategist working inside modern AI workflows.


    Why High-Retention Scripts Matter in 2026

    Short-form platforms don’t care how beautiful your video is.

    They care about:

    • Hook strength (first 1–2 seconds)
    • Retention drop-off rate
    • Rewatch behavior
    • Emotional spikes
    • Narrative pacing

    A strong script controls all of this before editing even begins.

    High-retention scripts are built to:

    • Prevent early swipe-away
    • Trigger curiosity loops
    • Maintain pacing every 3–5 seconds
    • Deliver payoff at the right moment
    • Encourage rewatch behavior

    And AI has completely changed how we build these scripts.


    AI Tools Used for High-Retention Script Generation (2026 Workflow)

    Modern creators no longer write scripts manually from scratch.

    Instead, they use AI-assisted storytelling systems:

    • CapCut → AI script-to-edit integration for short-form structure
    • Runway ML → Visual story generation aligned with scripts
    • Sora → AI cinematic storytelling and narrative simulation
    • Advanced LLM tools → Script structuring, hooks, and pacing optimization

    But here’s the truth:

    AI doesn’t create viral scripts by default.

    It creates raw structure. You refine it into retention-engineered storytelling.


    CapCut AI vs Manual Script Writing (Retention Impact)

    FeatureAI Script GenerationManual Writing
    SpeedExtremely fastSlow
    Hook OptimizationAI-generated variationsDepends on skill
    Retention StrategyData-driven patternsExperience-based
    Creativity ControlModerateFull control
    Viral PotentialHigh (if guided properly)Inconsistent

    AI gives you structure. Humans give it soul.

    The winning combination is both.


    Understanding High-Retention Script Structure

    Before using AI, you must understand the viral script formula used in 2026:

    1. Hook (0–2 seconds)

    Grab attention instantly.

    Examples:

    • “Nobody tells you this about…”
    • “This is why your videos aren’t going viral…”
    • “I tested 100 edits and this is what worked…”

    2. Problem (2–5 seconds)

    Introduce pain point or curiosity gap.

    3. Value Build (5–20 seconds)

    Deliver structured information in micro-segments.

    4. Payoff (20–35 seconds)

    Reveal transformation, result, or insight.

    5. Loop End (final seconds)

    End in a way that encourages replay.

    This structure is what AI must generate.


    Step-by-Step: How to Use AI to Generate High-Retention Short-Form Scripts

    Now let’s build a real workflow used by professional creators.


    Step 1: Define Your Content Goal

    Before AI generates anything, define:

    • Platform (TikTok, Reels, Shorts)
    • Video length (15s / 30s / 60s)
    • Topic niche (VFX, gaming, fitness, storytelling)
    • Emotional tone (shock, inspiration, curiosity, humor)

    Here is the real talk about high-retention editing: AI output is only as good as your input direction.


    Step 2: Generate Multiple Hook Variations

    Use AI to create 10–20 hook variations.

    Example prompt:

    “Generate 20 viral hooks for a 20-second short-form video about editing tricks for beginners.”

    Then select:

    • Most curiosity-driven hook
    • Most emotionally engaging hook
    • Most controversial hook

    Hooks are 70% of retention success.


    Step 3: Build Script Skeleton with AI

    Now ask AI to structure full script:

    Include:

    • Hook
    • Problem
    • Steps (3–5 micro points)
    • Payoff
    • CTA

    This is where tools like Runway ML can also align visuals with script pacing.


    Step 4: Optimize for 3–5 Second Attention Cycles

    Modern retention algorithms reset attention every few seconds.

    So your script must:

    • Shift idea every 3–5 seconds
    • Introduce micro-curiosity loops
    • Avoid long explanations

    Example:

    Instead of:
    “This is how you edit better videos…”

    Use:
    “Most editors fail at this one thing… and it kills their reach.”


    Step 5: Add Emotional Triggers

    AI scripts become viral when emotional structure is added:

    • Surprise
    • Urgency
    • Fear of missing out
    • Curiosity gaps
    • Transformation stories

    Even simple edits become viral when emotion is layered properly.


    Step 6: Convert Script into Visual Breakdown

    Now align script with visuals:

    • Scene change every sentence
    • Overlay text for hooks
    • Fast cuts for retention spikes
    • Slow moments for payoff clarity

    This is where CapCut AI integration becomes powerful.


    Step 7: Sync Script with Editing Flow

    Use tools like CapCut to:

    • Auto-generate captions
    • Match script timing to cuts
    • Add AI transitions
    • Enhance pacing using beat sync

    This ensures script and edit feel like one system.


    Step 8: Test Retention Variations

    Professional creators never use one script version.

    They test:

    • Hook A vs Hook B
    • Short vs extended pacing
    • Emotional vs informational tone

    AI makes this A/B testing extremely fast.


    Pro Scriptwriting Checklist (2026 Standard)

    Before finalizing your AI-generated script:

    • ✔ Hook triggers curiosity in under 2 seconds
    • ✔ Every 3–5 seconds introduces new information
    • ✔ No unnecessary filler sentences
    • ✔ Clear emotional arc exists
    • ✔ Strong payoff or reveal included
    • ✔ Loop-friendly ending designed
    • ✔ Matches visual pacing strategy

    Common Mistakes Beginners Make

    Mistake 1: Overwriting Scripts

    Too much explanation kills retention.

    Mistake 2: Weak Hooks

    If the first line fails, the video dies instantly.

    Mistake 3: No Structure Control

    Random AI output = random performance.

    Mistake 4: Ignoring Visual Timing

    Script must match edit pacing.

    Even great ideas fail if timing is off.


    Why AI Script Generation Works in 2026

    AI models now understand:

    • Viral content patterns
    • Retention curves
    • Emotional pacing structures
    • Platform-specific algorithms

    This means scripts are no longer “creative guesses” — they are data-informed storytelling systems.

    But creativity still matters.

    AI gives structure. You give impact.


    Where vfxcut.xyz Comes In

    At vfxcut.xyz, we break down real-world content systems used by viral creators—not theory, but production-ready workflows.

    You’ll learn:

    • AI-powered scripting systems
    • Short-form retention editing techniques
    • Visual storytelling frameworks
    • Viral pacing strategies used by top creators

    This is where beginners become strategic content engineers.


    Final Thoughts

    Learning how to use AI to generate high-retention short-form scripts is not about replacing creativity.

    It’s about scaling it.

    When done correctly, AI helps you:

    • Build viral hooks faster
    • Structure better pacing
    • Improve retention systematically
    • Reduce guesswork in content creation

    But here’s the key truth:

    AI writes scripts. You write impact.


    CTA

    Now it’s your turn.

    Start using AI to generate script variations, test different hooks, and build structured retention-driven storytelling systems.

    Then explore more advanced AI workflows, viral editing techniques, and short-form growth strategies on vfxcut.xyz, your ultimate hub for short-form creators and VFX enthusiasts.

    Go create scripts that don’t just inform… but hold attention till the last second.

  • Best free AI tools to convert long videos to shorts (2026 Professional Creator Workflow Guide)

    Best free AI tools to convert long videos to shorts (2026 Professional Creator Workflow Guide)

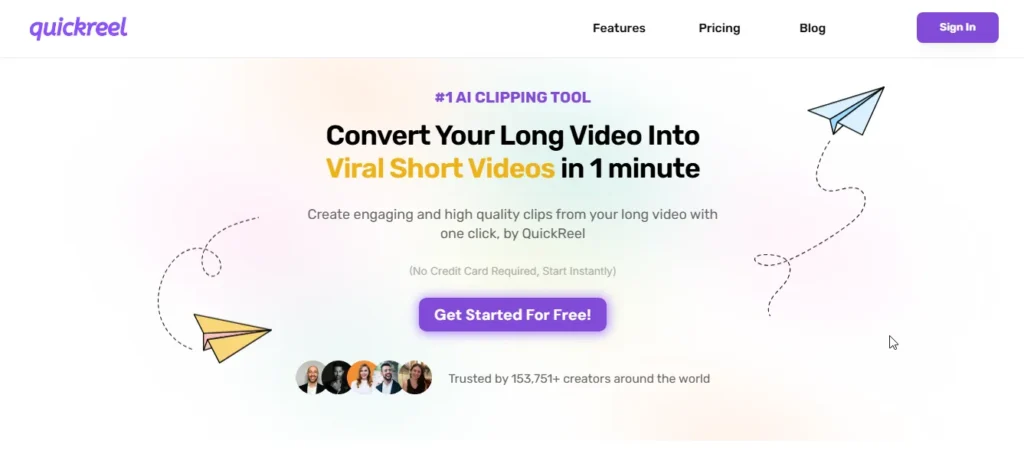
    If you’re sitting on long YouTube videos, podcasts, webinars, or gameplay recordings and wondering how creators are suddenly flooding TikTok, Reels, and Shorts with perfectly timed clips…

    Here’s the answer:

    They’re not manually cutting everything anymore.

    They’re using AI.

    And in 2026, the best free AI tools to convert long videos to shorts are completely changing how content is repurposed, edited, and distributed across platforms.

    Look, I’ve spent years inside editing timelines breaking long-form content into viral short-form clips, and I can tell you this honestly:
    repurposing is now more powerful than original filming.

    Let’s break it down like a professional VFX editor building a content pipeline.


    Why AI Video Repurposing Is Dominating in 2026

    Short-form platforms now prioritize:

    • High retention micro-clips
    • Hook-based storytelling
    • Emotionally dense moments
    • Fast content recycling
    • Multi-platform distribution

    Long videos are no longer “finished content.”

    They are content mines.

    AI tools now extract:

    • Viral moments
    • Emotional peaks
    • Hook-worthy sentences
    • Action-heavy sequences
    • Engagement spikes

    This is why creators can post 10–30 shorts from a single long video.


    Best Free AI Tools to Convert Long Videos to Shorts (2026 Stack)

    Modern creators use a hybrid AI workflow instead of one tool.

    Here’s the professional stack:

    • CapCut → Auto-cut shorts + captions + templates
    • Runway ML → Smart scene detection + AI clipping
    • Sora → AI-enhanced storytelling + scene recreation
    • YouTube Studio AI → Basic highlight detection
    • Descript-style tools → Text-based video editing

    But the real power comes from combining AI clipping + human refinement.


    CapCut vs Runway vs Traditional Editing (Short Conversion Workflow)

    FeatureCapCut AIRunway MLManual Editing
    Auto Clip DetectionStrongAdvancedNone
    Hook DetectionAI-basedContext-awareManual
    SpeedExtremely fastFastSlow
    Editing ControlMediumHighVery high
    Best ForBeginners & creatorsPro AI workflowsFilm editors

    For 90% of creators, CapCut alone is enough.


    How AI Converts Long Videos into Viral Shorts

    Before the steps, understand the AI logic:

    AI scans long videos using:

    • Speech recognition
    • Emotion detection
    • Scene change tracking
    • Engagement prediction
    • Keyword spotting

    Then it identifies:

    • Viral hooks
    • Emotional spikes
    • Story turning points
    • Visual highlights

    This is why AI tools can cut 1-hour videos into 10–20 shorts automatically.


    Step-by-Step: Using AI Tools to Convert Long Videos into Shorts

    Now let’s build a real professional workflow.


    Step 1: Import Long-Form Video

    Open CapCut and import your:

    • Podcast
    • YouTube video
    • Gameplay session
    • Webinar or tutorial

    Best practice:

    • Use high audio clarity
    • Ensure speaker is visible if possible
    • Avoid excessive background noise

    Here is the real talk about high-retention editing: AI performs best when input quality is clean.


    Step 2: Use AI Auto-Cut Feature

    Go to:

    AI Tools → “Auto Cut” or “Smart Highlights”

    CapCut will:

    • Scan speech patterns
    • Detect emotional spikes
    • Identify engaging moments
    • Split content into short segments

    Each segment is potential viral content.


    Step 3: Select High-Retention Moments

    Not all AI cuts are equal.

    Choose clips that contain:

    • Strong hook lines
    • Emotional reactions
    • Unexpected statements
    • Story turning points

    Avoid:

    • Long explanations
    • Slow intros
    • Repetitive dialogue

    Retention is everything.


    Step 4: Refine Clips Using AI Assistant

    Now enhance selected clips:

    • Auto captions
    • Keyword highlighting
    • Smart zoom on speaker face
    • AI noise reduction

    You can also pass clips into Runway ML for advanced segmentation or cleanup.


    Step 5: Add Viral Short Structure

    Every short must follow this structure:

    1. Hook (0–2 sec)
    2. Context (2–5 sec)
    3. Value (5–20 sec)
    4. Payoff (final seconds)
    5. Loop ending

    AI tools often detect structure automatically, but manual adjustment improves performance.


    Step 6: Add Captions for Retention Boost

    Captions increase retention by 40–60%.

    Use:

    • Bold keywords
    • Highlighted emotional words
    • Dynamic text animation
    • Sync with speech rhythm

    Modern CapCut AI auto-generates captions with timing accuracy.


    Step 7: Reframe for Vertical Shorts (9:16)

    Convert long horizontal videos into vertical format:

    • Auto crop subject tracking
    • Face-centered framing
    • Motion follow mode
    • Zoom-based repositioning

    This is essential for TikTok, Reels, and Shorts.


    Step 8: Enhance with AI Visual Upgrades (2026 Trick)

    Now apply AI enhancements:

    • Background blur
    • Motion stabilization
    • Color correction
    • Sharpness boost

    If needed, use Sora for cinematic reimagining of scenes or transitions.


    Step 9: Export Multiple Variations

    Do not export only one version.

    Instead:

    • Create 3–5 variations per clip
    • Change hook text
    • Adjust pacing slightly
    • Test different captions

    This is how viral creators scale content.


    AI Settings Checklist for Viral Shorts (2026 Standard)

    Before exporting:

    • ✔ Hook appears within first 2 seconds
    • ✔ Clip duration under 60 seconds
    • ✔ Captions are synced and readable
    • ✔ Subject is properly centered
    • ✔ No dead audio space
    • ✔ Color grading is consistent
    • ✔ Motion is smooth and intentional

    Common Mistakes Beginners Make

    Mistake 1: Trusting AI Without Editing

    AI clips are raw material, not final edits.

    Mistake 2: Keeping Weak Hooks

    First 2 seconds decide performance.

    Mistake 3: Ignoring Audio Quality

    Bad audio kills retention instantly.

    Mistake 4: Overloading Effects

    Too many transitions reduce clarity.

    Even small mistakes reduce viral potential.


    Why AI Repurposing Is So Powerful in 2026

    AI has evolved from simple cutting tools into:

    • Semantic understanding systems
    • Emotion recognition engines
    • Engagement prediction models
    • Narrative segmentation tools

    This means long videos are no longer static content—they are data-rich storytelling libraries.

    And AI is the extractor.


    Where vfxcut.xyz Comes In

    At vfxcut.xyz, we break down real-world workflows used by viral editors and content engineers.

    You’ll learn:

    • AI-driven editing pipelines
    • Short-form retention strategies
    • Viral scripting and pacing systems
    • Professional VFX workflows for creators

    This is where raw footage becomes engineered content.


    Final Thoughts

    Learning the best free AI tools to convert long videos to shorts is not just about automation.

    It’s about content multiplication.

    When used correctly, AI helps you:

    • Turn 1 video into 10–30 shorts
    • Extract viral moments automatically
    • Scale content across platforms
    • Increase output without increasing workload

    But here’s the key truth most creators miss:

    AI finds moments. You define meaning.


    CTA

    Now it’s your turn.

    Take one long video, run it through AI tools, and start identifying viral moments you never noticed before.

    Then explore more advanced AI workflows, short-form editing systems, and viral growth strategies on vfxcut.xyz, your ultimate hub for short-form creators and VFX enthusiasts.

    Start turning long content into viral short-form dominance today.

  • How to use Runway Gen-2 for cinematic b-roll (2026 Professional AI Filmmaking Guide)

    How to use Runway Gen-2 for cinematic b-roll (2026 Professional AI Filmmaking Guide)

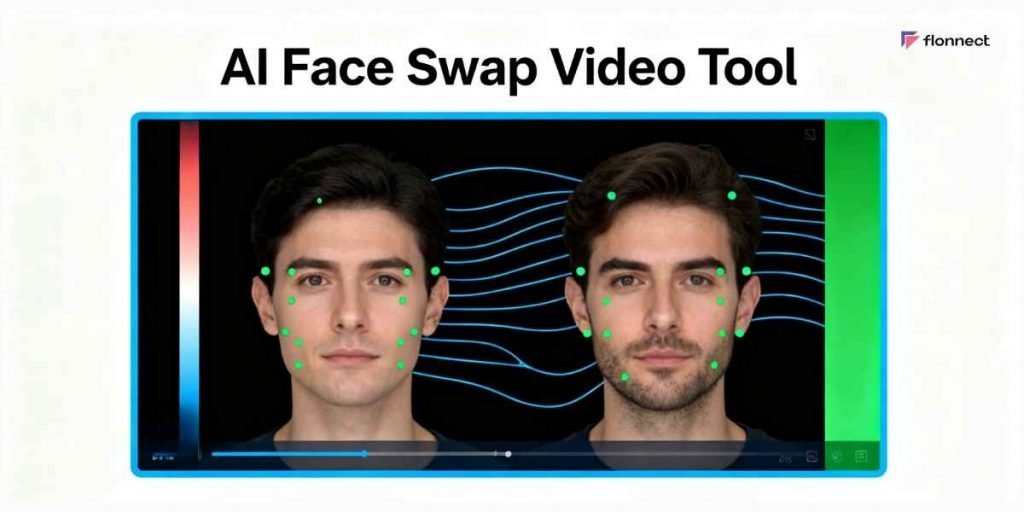
    If you’ve ever watched a cinematic YouTube video or a viral Reel and thought, “Where did they even get that b-roll?”, here’s the truth:

    A huge percentage of it is no longer filmed.

    It’s generated.

    And in 2026, learning how to use Runway Gen-2 for cinematic b-roll has become one of the most powerful skills for modern content creators, editors, and VFX artists.

    Look, I’ve spent over a decade working with traditional footage, stock libraries, and now AI-generated visuals—and I can tell you this honestly:

    AI b-roll is not replacing filmmaking… it’s accelerating it.

    Let’s break it down like a real production pipeline used in modern short-form storytelling.


    Why AI-Generated B-Roll Is Dominating in 2026

    Short-form platforms now prioritize:

    • Fast visual storytelling
    • High cinematic density
    • Emotion-driven transitions
    • Zero dead space in edits
    • Unique visuals that stand out instantly

    Traditional stock footage often feels repetitive.

    AI b-roll fixes this by generating:

    • Custom cinematic environments
    • Dynamic camera movement
    • Impossible real-world shots
    • Stylized storytelling visuals
    • Fully controlled atmosphere scenes

    That’s why creators now rely heavily on tools like Runway ML.


    What is Runway Gen-2 in Modern AI Editing Workflow

    Runway Gen-2 is an AI video generation system that creates:

    • Cinematic motion clips from text prompts
    • Stylized video environments
    • Controlled camera movement sequences
    • Scene-based visual storytelling

    Instead of searching stock libraries, you describe the shot.

    Example:

    “A cinematic drone shot over a neon cyberpunk city at night, slow motion, rain reflections, shallow depth of field.”

    And the AI generates it.


    Runway Gen-2 vs Traditional Stock Footage Workflow

    FeatureRunway Gen-2Stock Footage
    CustomizationFully AI-generatedLimited library
    CostFree + paid tiersOften paid per clip
    UniquenessHighLow (reused clips)
    SpeedInstant generationSearch + download
    Creative ControlFull prompt controlRestricted

    For cinematic storytelling, AI clearly wins.


    How to Use Runway Gen-2 for Cinematic B-Roll (Step-by-Step Guide)

    Now let’s build a real workflow used by professional creators.


    Step 1: Define Your Cinematic Intent

    Before opening Runway ML, decide:

    • Mood (cinematic, dramatic, futuristic, emotional)
    • Environment (city, nature, abstract, indoor)
    • Camera style (drone, handheld, dolly, slow zoom)
    • Time of day (golden hour, night, neon, foggy)

    Here is the real talk about high-retention editing: AI output depends 100% on your creative direction.


    Step 2: Write High-Precision AI Prompts

    Your prompt is your director’s instruction.

    Bad prompt:
    “City at night”

    Good prompt:
    “Ultra cinematic aerial drone shot of a futuristic city at night, neon reflections on wet streets, slow camera movement, 4K film grain, shallow depth of field, moody lighting”

    The difference is retention-quality output.


    Step 3: Generate Multiple Variations

    Never settle for one output.

    Generate:

    • Wide establishing shots
    • Close-up motion shots
    • Atmospheric transition clips
    • Abstract cinematic inserts

    This gives your edit visual rhythm.


    Step 4: Select High-Impact Clips for Storytelling

    Choose clips based on:

    • Motion clarity
    • Lighting depth
    • Emotional tone
    • Camera movement quality
    • Scene uniqueness

    Avoid flat or static outputs.


    Step 5: Import into Your Editing Timeline

    Bring generated clips into your editor:

    • CapCut (mobile workflow)
      OR
    • Adobe Premiere Pro (pro workflow)

    Now your AI b-roll becomes part of a structured narrative.


    Step 6: Match B-Roll with Story Beats

    Cinematic b-roll is not random.

    You must align visuals with:

    • Voiceover pacing
    • Emotional peaks
    • Script transitions
    • Music rhythm

    Example:

    • Emotional line → slow cinematic rain scene
    • Strong statement → fast drone motion shot
    • Transition → abstract AI-generated visuals

    This is where storytelling becomes powerful.


    Step 7: Add Camera Motion Enhancement

    Even AI-generated clips benefit from post motion control:

    • Slow zoom in/out
    • Slight horizontal pan
    • Digital stabilization
    • Motion blur during transitions

    This creates a “filmed reality” illusion.


    Step 8: Color Grade for Cinematic Consistency

    AI outputs vary in tone.

    Apply:

    • Filmic contrast curve
    • Teal & orange balance (optional cinematic style)
    • Shadow depth enhancement
    • Highlight softening
    • Grain overlay for realism

    Without grading, AI footage feels disconnected.


    Step 9: Blend AI B-Roll with Real Footage

    The best creators combine:

    • AI-generated b-roll
    • Real smartphone footage
    • Stock overlays
    • Motion graphics

    This hybrid workflow increases realism and engagement.


    Step 10: Export for Short-Form Platforms

    Recommended settings:

    • Resolution: 1080×1920 (vertical)
    • FPS: 30 or 60 depending on motion
    • Bitrate: High (15–25 Mbps)
    • Format: MP4 (H.264)

    Proper export ensures AI detail is preserved.


    Cinematic Prompt Settings Checklist (2026 Standard)

    Before generating AI b-roll, ensure:

    • ✔ Clear visual subject defined
    • ✔ Camera movement specified
    • ✔ Lighting environment included
    • ✔ Mood or emotion described
    • ✔ Time of day defined
    • ✔ Depth of field mentioned
    • ✔ Style reference included (cinematic, film, etc.)

    Common Mistakes Beginners Make

    Mistake 1: Weak Prompts

    Vague prompts create unusable footage.

    Mistake 2: No Story Context

    Random AI clips don’t build emotional engagement.

    Mistake 3: Ignoring Color Consistency

    Mismatch breaks cinematic illusion.

    Mistake 4: Overusing AI Effects

    Too much artificial enhancement reduces realism.

    Even powerful AI tools fail without creative direction.


    Why Runway Gen-2 Is a Game Changer in 2026

    AI video generation now understands:

    • Motion physics
    • Scene composition
    • Lighting simulation
    • Camera behavior
    • Cinematic language patterns

    This means creators can generate professional-grade b-roll without filming expensive setups.

    But here’s the truth:

    AI doesn’t replace directors—it replaces limitations.


    Where vfxcut.xyz Comes In

    At vfxcut.xyz, we break down real-world AI filmmaking workflows used by viral creators and professional editors.

    You’ll learn:

    • AI b-roll generation systems
    • Short-form cinematic storytelling
    • Advanced color grading techniques
    • High-retention editing strategies

    This is where creators evolve into visual storytellers.


    Final Thoughts

    Learning how to use Runway Gen-2 for cinematic b-roll is not just a technical skill—it’s a creative shift.

    You are no longer dependent on:

    • Locations
    • Equipment
    • Stock libraries

    Instead, you control:

    • Mood
    • Environment
    • Camera movement
    • Storytelling structure

    But here’s the key truth most creators miss:

    AI creates visuals. You create meaning.


    CTA

    Now it’s your turn.

    Start experimenting with AI prompts, generate cinematic b-roll, and build your own visual storytelling system using Runway Gen-2.

    Then explore more advanced AI editing workflows, VFX breakdowns, and viral short-form strategies on vfxcut.xyz, your ultimate hub for short-form creators and VFX enthusiasts.

    Go create visuals that don’t just look cinematic—but feel like a film.

  • Creating AI Talking Avatars for Faceless YouTube Shorts (2026 Viral Growth Guide)

    Creating AI Talking Avatars for Faceless YouTube Shorts (2026 Viral Growth Guide)

    If you’ve been scrolling YouTube Shorts lately, you’ve probably noticed something wild: half the viral content isn’t even filmed with real presenters anymore. Instead, creators are using AI talking avatars for faceless YouTube Shorts, powered by next-generation tools that can speak, react, and even mimic human emotion with scary accuracy.

    Look, I’ve spent over a decade in short-form editing—working with TikTok ads, YouTube automation channels, and AI-assisted storytelling pipelines—and I can tell you this honestly: we’ve entered the era where “face reveal” is optional, not required.

    Here’s the real shift in 2026: storytelling beats personality exposure. And AI avatars are just a delivery system for retention-focused content.

    Let’s break it down like a professional VFX and short-form editor would inside a real production pipeline.


    Why AI Talking Avatars Are Dominating Faceless YouTube Channels

    The rise of faceless content isn’t random. It’s driven by algorithm behavior.

    Key reasons this format is exploding:

    • Higher upload frequency without filming delays
    • Zero camera anxiety or setup constraints
    • Scalable content production (1 script = 10 videos)
    • Easy localization for global audiences
    • AI voice + avatar consistency builds brand identity

    Platforms like YouTube Shorts and TikTok now prioritize watch time retention over production complexity. That means even AI-generated presenters can outperform real influencers if the pacing is right.

    And here’s the truth most beginners miss:
    👉 It’s not the avatar that goes viral. It’s the script structure and pacing behind it.


    Best AI Tools for Talking Avatars (2026 Workflow Stack)

    In 2026, creators rarely rely on one tool. Instead, they use a hybrid AI pipeline.

    Core AI Avatar Tools

    • HeyGen AI – realistic talking avatars with emotion control
    • Synthesia 2026 – corporate + educational avatar generation
    • D-ID Studio – fast face animation from images
    • Runway Gen-3 – cinematic avatar motion and environment control
    • CapCut AI Presenter Mode – mobile-friendly avatar creation

    Supporting Tools

    • ChatGPT-style script generators (for retention scripting)
    • ElevenLabs AI voice cloning (natural human voice synthesis)
    • Sora (OpenAI) – cinematic background generation for Shorts

    CapCut vs Synthesia for AI Talking Avatar Creation

    FeatureCapCut AI PresenterSynthesia
    Ease of UseVery simple mobile workflowMedium complexity
    Avatar RealismGood for ShortsExtremely realistic
    Editing ControlHigh (mobile timeline edits)Limited post-control
    Voice QualityAI-generated basicAdvanced neural voice
    Best Use CaseTikTok & YouTube ShortsCorporate videos, training content

    If you’re focused on faceless YouTube Shorts growth, CapCut AI is usually the faster option. But for premium storytelling, Synthesia still wins in realism.


    How to Create AI Talking Avatars for Faceless YouTube Shorts (Step-by-Step Workflow)

    Now let’s get into the actual production pipeline. This is the same structure used by many faceless automation channels scaling to millions of views.


    Step 1: Build a High-Retention Script (Most Important Step)

    Before touching any AI tool, you need a script designed for retention.

    Here’s the structure I personally use:

    1. Hook (0–2 seconds)

    • Bold claim or question
    • Pattern interrupt

    Example:
    “Most people think AI avatars are fake… until they see this.”

    2. Problem (2–6 seconds)

    • Identify viewer frustration
    • Keep it relatable

    3. Value Delivery (6–25 seconds)

    • Step-by-step insight
    • Fast pacing, no filler

    4. Loop Ending (last 3 seconds)

    • Open loop or curiosity reset

    This structure alone can increase retention by 30–60% if done correctly.


    Step 2: Generate Your AI Avatar

    Now move into your tool of choice.

    In CapCut AI Presenter:

    1. Open CapCut → AI Tools → “Talking Avatar”
    2. Upload or select avatar model
    3. Choose voice style (neutral, energetic, educational)
    4. Adjust expression intensity (medium works best)
    5. Sync script with auto-lip sync engine

    Pro tip from real editing experience:
    👉 Avoid extreme facial expressions. Subtle movement feels more “real” and improves watch time retention.


    Step 3: Add AI Voiceover (Critical for Realism)

    Even though avatars can generate voice, I recommend using ElevenLabs AI voices for better control.

    Settings I use:

    • Stability: 35–55%
    • Clarity: High
    • Emotion: Medium
    • Speed: Slightly fast (1.05x)

    This creates a more “scroll-stopping” rhythm.


    Step 4: Background Generation with Runway or Sora

    This is where cinematic quality increases dramatically.

    Use:

    • Runway Gen-3 → dynamic motion backgrounds
    • Sora → cinematic storytelling environments

    Examples:

    • futuristic newsroom
    • cyberpunk studio
    • minimalist tech space
    • abstract motion gradient

    Here is the real talk about high-retention editing:
    👉 Background motion = subconscious engagement boost.


    Step 5: Edit in CapCut for Viral Structure

    Now bring everything into CapCut.

    Editing sequence:

    • Sync avatar + voice
    • Add jump cuts every 1.5–2.5 seconds
    • Insert zoom-in keyframes on important words
    • Add subtitle animations (always on-screen captions)
    • Use speed ramping for emphasis

    Captions are not optional anymore—they are retention anchors.


    Step 6: Add AI Enhancements for 2026 Style

    Modern faceless channels rely heavily on AI polish.

    Apply:

    • Auto color grading
    • AI sharpening
    • Motion tracking overlays
    • Background blur separation
    • Light glow effects (subtle only)

    Don’t overdo effects—this is a common beginner mistake that kills authenticity.


    Step 7: Optimize for Shorts Algorithm

    To maximize reach:

    • Keep videos 15–35 seconds
    • Maintain fast pacing (no dead air)
    • Ensure hook in first 1.5 seconds
    • Use looping endings
    • Add emotional trigger words

    Retention = algorithm distribution.

    Simple equation:

    High retention → more replays → viral push


    Common Mistakes Beginners Make

    Let’s fix what usually goes wrong:

    Mistake 1: Over-animated avatars

    Too much movement looks robotic, not human.

    Mistake 2: Weak scripts

    AI avatar cannot save a boring script.

    Mistake 3: Slow pacing

    Short-form content must feel compressed.

    Mistake 4: Ignoring subtitles

    Silent viewers still need engagement.

    Even small mistakes can reduce watch time drastically.


    Why AI Talking Avatars Work So Well in 2026

    We’ve moved from “face-driven content” to “system-driven content.”

    AI avatars succeed because:

    • They are consistent
    • They scale infinitely
    • They remove creator burnout
    • They fit algorithm-friendly storytelling formats

    Platforms now reward content systems, not just personalities.

    That’s why faceless channels are scaling faster than traditional vlog creators.


    Where vfxcut.xyz Fits Into This Workflow

    At vfxcut.xyz, we break down real production systems used by viral creators:

    • AI avatar workflows
    • Short-form retention scripting
    • CapCut editing systems
    • Runway + Sora cinematic pipelines
    • Viral storytelling psychology

    This isn’t theory—it’s the exact structure used in modern faceless YouTube automation channels.


    Final Thoughts

    Creating AI talking avatars for faceless YouTube Shorts is no longer a futuristic idea—it’s the current standard for scalable content creation.

    But here’s what separates viral creators from average ones:

    👉 They don’t rely on tools. They rely on structure.

    If your script is strong, your pacing is tight, and your visuals support retention, AI avatars become a powerful growth engine.


    CTA

    Start building your first AI avatar video today. Test different voices, experiment with pacing, and refine your retention structure.

    Then explore more advanced tutorials, AI workflows, and short-form editing systems on vfxcut.xyz, your ultimate hub for VFX creators and faceless content builders.

    Now go create something that doesn’t just look AI-generated—but looks viral.

  • How to Use ElevenLabs for Viral TikTok Voiceovers (2026 Pro Workflow That Actually Works)

    How to Use ElevenLabs for Viral TikTok Voiceovers (2026 Pro Workflow That Actually Works)

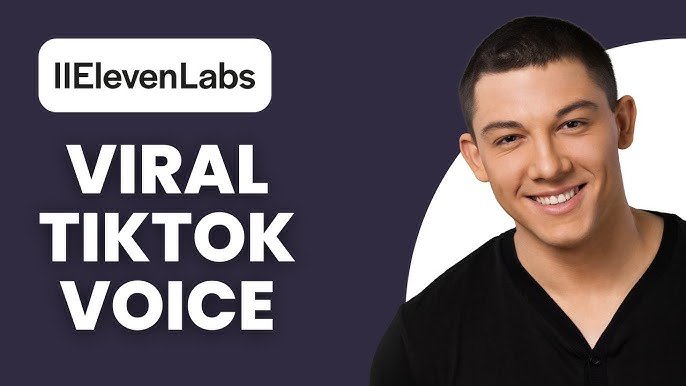
    Learn how to use ElevenLabs for viral TikTok voiceovers with pro editing techniques, AI tools, and retention hacks.

    The New Voiceover Era: Why ElevenLabs is Dominating TikTok in 2026

    Look, I’ve spent hours in the editing suite so you don’t have to—and here’s the real talk: voiceovers are no longer optional on TikTok. They are the hook engine. And if you’re not using AI voice tools like ElevenLabs, you’re already behind.

    In 2026, viral content is built on three pillars:

    • Instant hook (0–2 seconds)
    • High-retention pacing
    • Emotionally engaging voiceovers

    ElevenLabs is leading because of its hyper-realistic voice synthesis, dynamic emotional range, and control over pacing—something traditional TTS tools still struggle with.

    And when you combine it with tools like CapCut, Runway, and Sora, you unlock a full AI-powered viral pipeline.

    Why TikTok Voiceovers Go Viral (Retention Science)

    Here is the real secret sauce: TikTok doesn’t reward “good content.” It rewards watched content.

    Voiceovers directly impact:

    • Average watch time
    • Loop rate
    • Completion percentage

    A robotic voice = instant swipe.
    A dynamic, human-like AI voice = curiosity spike.

    ElevenLabs excels because it allows:

    • Micro-pauses for suspense
    • Emotional inflection (fear, excitement, urgency)
    • Natural pacing that mimics storytelling

    Gear & Software Stack (2026 Creator Setup)

    Essential Tools

    ToolPurposeWhy It Matters
    ElevenLabsAI voice generationHyper-realistic narration
    CapCut AIEditing & captionsFast TikTok-native edits
    RunwayBackground removal & effectsPro VFX without After Effects
    SoraAI video generationCreate scenes from prompts

    If your serious about viral content, this stack is non-negotiable.

    ElevenLabs Settings Checklist for Viral Voiceovers

    Before we jump into the step-by-step proccess, lock in these settings:

    Voice Settings (Optimized for TikTok)

    • Stability: 35–50
      (Lower = more expressive, higher = more robotic)
    • Clarity + Similarity: 75–90
      (Keeps the voice sharp without losing natural tone)
    • Style Exaggeration: 20–40
      (Adds emotional depth—critical for storytelling)
    • Speed Adjustment: 0.95x–1.05x
      (Slight variations improve retention)
    • Pause Control: Manual via punctuation
      (Use commas and ellipses for rhythm)

    Pro tip: Add line breaks strategically. It forces the AI to “breathe”—yes, seriously.

    Step-by-Step: How to Use ElevenLabs for Viral TikTok Voiceovers

    Step 1: Write a Retention-Driven Script

    Before you even open ElevenLabs, your script needs to hit hard.

    Use this structure:

    • Hook (0–2 sec): “This mistake is ruining your videos…”
    • Build curiosity: “And no one is talking about it.”
    • Payoff: Deliver value fast
    • Loop trigger: “Watch this again…”

    Bad scripts kill good voices. Period.

    Step 2: Generate Voice in ElevenLabs

    1. Open ElevenLabs
    2. Paste your script
    3. Select a voice (choose storytelling or conversational tones)
    4. Apply the optimized settings above
    5. Generate multiple variations (this is key)

    Here’s the trick most beginners miss:
    Generate 2–3 versions and pick the most emotional one.

    Step 3: Import into CapCut AI

    Bring your audio into CapCut and:

    • Sync voiceover with visuals
    • Use auto captions (boosts retention by ~30%)
    • Add keyframing for subtle zooms
    • Insert jump cuts every 1.5–2 seconds

    This is where editting becomes storytelling.

    Step 4: Enhance with Visual Hooks

    Use:

    • Motion blur transitions
    • Text overlays
    • AI-generated clips from Sora
    • Background removal via Runway

    Your goal is simple: no dead frames.

    Step 5: Sound Design & Layering

    Don’t just drop a voiceover and call it done.

    Add:

    • Subtle background music (-25dB)
    • Impact sounds (whooshes, clicks)
    • Reverb (very light, for depth)

    Audio layering increases perceived quality instantly.

    Step 6: Color Grading for Engagement

    Even for short-form:

    • Increase contrast slightly
    • Boost saturation by 5–10%
    • Use warm tones for storytelling

    Yes, color grading matters—even on TikTok.

    Step 7: Export Settings for TikTok

    • Resolution: 1080×1920
    • Bitrate: 10–15 Mbps
    • FPS: 30 or 60
    • Audio: AAC 320kbps

    Clean exports = better algorithm treatment.

    Advanced Techniques (What Pro Editors Actually Do)

    1. Emotional Mapping

    Match voice tone to visuals:

    • Excited voice → fast cuts
    • Serious tone → slower pacing

    This alignment increases immersion.

    2. Micro-Retention Editing

    Every 1–2 seconds:

    • Change angle
    • Add text
    • Zoom slightly

    This prevents viewer fatigue.

    3. Loop Engineering

    End your video in a way that connects to the start.

    Example:
    End: “And that’s why this changes everything…”
    Start: “This changes everything…”

    Boom—loop achieved.

    4. Voice Layering Hack

    Duplicate your ElevenLabs voice:

    • One normal
    • One slightly lower volume + slight delay

    This creates a richer, almost cinematic feel.

    Common Mistakes to Avoid

    • Using default voice settings (lazy + obvious)
    • Overloading effects (kills clarity)
    • Ignoring pacing (biggest retention killer)
    • No captions (you lose silent viewers)
    • Poor script structure (nothing can fix this)

    Also… don’t trust the first render. Your first version is almost always mid.

    CapCut vs Premiere Pro (Short-Form Comparison)

    FeatureCapCut AIPremiere Pro
    SpeedExtremely fastSlower
    AI ToolsBuilt-inLimited
    Ease of UseBeginner-friendlyAdvanced
    TikTok OptimizationNativeManual
    KeyframingBasicAdvanced

    For TikTok? CapCut wins.
    For cinematic edits? Premiere still dominates.

    The Future of AI Voiceovers (What’s Coming Next)

    We’re moving into:

    • Real-time voice generation
    • Emotion-aware AI narration
    • Auto-sync with visuals

    Tools like ElevenLabs are just getting started.

    Soon, you won’t just generate voice—you’ll generate entire viral videos from a single prompt.

    Final Thoughts: The Real Formula

    Here’s the truth most creators ignore:

    It’s not the tool. It’s how you use it.

    ElevenLabs gives you the voice.
    But you control:

    • The pacing
    • The storytelling
    • The retention strategy

    If your videos aren’t performing, it’s not the AI—it’s the execution.

    And yeah, that might sting a little.

    Your Next Move

    Now it’s your turn.

    Take this workflow, open ElevenLabs, and create your first viral-ready voiceover. Test different tones, push your editting skills, and experiment with pacing.

    Then upload it. Analyze it. Improve it.

    And when you’re ready to level up even more, dive deeper into advanced VFX, storytelling, and AI workflows at vfxcut.xyz—the ultimate hub for creators who actually want to go viral.

    Now go make something that people can’t scroll past.

  • Best AI Video Upscalers for Low-Quality Mobile Footage (Turn Blurry Clips into Viral Content)

    Best AI Video Upscalers for Low-Quality Mobile Footage (Turn Blurry Clips into Viral Content)

    Discover the best AI video upscalers for low-quality mobile footage and transform blurry clips into sharp, viral-ready videos.

    Why Upscaling is the Secret Weapon for Viral Short-Form Content

    Look, I’ve spent hours in the editing suite so you don’t have to—and here’s the truth: most viral videos aren’t shot on expensive cameras anymore. They start as low-quality mobile clips… and get transformed.

    In 2026, the difference between a video that flops and one that explodes often comes down to:

    • Clarity
    • Perceived quality
    • Retention

    Blurry footage kills retention instantly. But with the rise of AI video upscalers, you can now take 480p or 720p clips and push them toward near 4K quality—if you know what your doing.

    And yes, tools like CapCut, Runway, and Topaz Video AI are leading this revolution.

    What Makes an AI Video Upscaler “Good” in 2026?

    Not all upscalers are equal. The best AI video upscalers for low-quality mobile footage do three things exceptionally well:

    1. Detail Reconstruction

    They don’t just stretch pixels—they predict missing detail using trained AI models.

    2. Noise Reduction

    Mobile footage often has grain. A good upscaler removes noise without smearing faces.

    3. Motion Consistency

    Bad upscalers cause flickering. The best ones maintain temporal consistency frame-by-frame.

    Here is the real talk about high-retention editing:
    If your upscale introduces artifacts, your audience will feel it—even if they don’t consciously notice it.

    Best AI Video Upscalers for Low-Quality Mobile Footage (2026 Picks)

    1. Topaz Video AI (Industry Standard)

    Best for: Professional-grade enhancement

    Topaz is still king. Its AI models like Proteus and Artemis are insane for:

    • Recovering facial details
    • Removing compression artifacts
    • Upscaling up to 8K

    Downside? It’s slower. But quality-wise, nothing beats it.

    2. Runway (Cloud-Based Power)

    Best for: Fast AI workflows

    Runway’s upscaling + enhancement tools are perfect for creators who want:

    • Quick processing
    • Browser-based editing
    • Integrated VFX tools

    Bonus: You can combine upscaling with background removal and motion tracking.

    3. CapCut AI Upscaler (Best for TikTok Creators)

    Best for: Speed + simplicity

    CapCut AI now includes:

    • One-click video enhancement
    • Built-in sharpening + denoise
    • Auto optimization for TikTok

    It’s not as powerful as Topaz—but it’s fast, and honestly, that matters more for content volume.

    4. DaVinci Resolve (Studio AI Tools)

    Best for: Advanced editors

    With Neural Engine features:

    • Super Scale upscaling
    • Noise reduction
    • Professional color grading

    This is where upscaling meets cinematic finishing.

    5. Sora (Next-Gen Enhancement)

    Best for: AI-assisted recreation

    Sora isn’t just an upscaler—it can rebuild scenes.
    You can enhance footage by generating missing frames or improving visual quality beyond traditional upscaling.

    This is where the future is heading.

    Comparison Table: Best AI Upscalers (2026)

    ToolQualitySpeedEase of UseBest For
    Topaz Video AI⭐⭐⭐⭐⭐SlowMediumProfessional edits
    Runway⭐⭐⭐⭐FastEasyCloud workflows
    CapCut AI⭐⭐⭐Very FastVery EasyTikTok/Reels
    DaVinci Resolve⭐⭐⭐⭐⭐MediumHardAdvanced users
    Sora⭐⭐⭐⭐⭐ExperimentalMediumFuture workflows

    AI Upscaling Settings Checklist (Pro-Level Optimization)

    Before you hit export, lock these in:

    Resolution Target

    • 1080p minimum (for TikTok)
    • 4K if cropping is needed

    Sharpening

    • Keep it subtle (avoid halos)
    • Use AI sharpening instead of manual when possible

    Noise Reduction

    • Medium strength (don’t overdo it)
    • Preserve skin texture

    Frame Interpolation

    • Use only if footage is choppy
    • Avoid over-smoothing (it looks fake)

    Bitrate

    • 10–20 Mbps for vertical video

    Small tweaks here massively impact final retention.

    Step-by-Step: How to Upscale Low-Quality Mobile Footage

    Step 1: Analyze Your Footage

    Ask yourself:

    • Is it blurry or just low resolution?
    • Is there noise or compression artifacts?
    • Is motion smooth?

    This determines your workflow.

    Step 2: Choose the Right Tool

    • High-quality project → Topaz Video AI
    • Fast TikTok content → CapCut
    • Hybrid workflow → Runway

    Don’t overcomplicate it.

    Step 3: Apply AI Upscaling

    In Topaz:

    • Select Proteus model
    • Set upscale to 200–400%
    • Adjust recover detail + reduce noise

    In CapCut:

    • Use “Enhance Quality”
    • Combine with sharpening

    This is where the magic starts.

    Step 4: Fix Artifacts Manually

    Even AI isn’t perfect.

    Use:

    • Masking for faces
    • Selective sharpening
    • Blur backgrounds slightly

    Yes, this takes extra time—but it’s what separates pros from beginners.

    Step 5: Add Motion & Keyframing

    Now we move into storytelling.

    • Add subtle zoom-ins
    • Use keyframing for movement
    • Keep visual changes every 1–2 seconds

    This boosts retention massively.

    Step 6: Color Grading After Upscaling

    Never color grade before upscaling.

    • Adjust contrast
    • Fix white balance
    • Enhance skin tones

    Good color grading can make average footage look premium.

    Step 7: Export for TikTok

    • 1080×1920
    • H.264 codec
    • High bitrate
    • Clean audio

    Your video is now ready to compete.

    Advanced Techniques (What Actually Makes It Viral)

    1. Hybrid AI Workflow

    Use:

    • Topaz for upscaling
    • CapCut for editing
    • Runway for effects

    Stacking tools = better results.

    2. Perceptual Sharpness Trick

    Instead of over-sharpening:

    • Increase contrast slightly
    • Add micro grain

    This creates the illusion of sharpness without artifacts.

    3. Retention-Based Editing

    Upscaling alone won’t save bad pacing.

    Every 2 seconds:

    • Add motion
    • Change visuals
    • Reinforce the hook

    4. AI + VFX Fusion

    Combine upscaling with:

    • Motion graphics
    • Text overlays
    • Sound design

    This is where your content becomes addictive.

    Common Mistakes That Kill Quality

    • Over-sharpening (creates halos)
    • Ignoring noise reduction
    • Upscaling already compressed exports
    • Skipping color grading
    • Rushing the proccess

    And the biggest one: relying only on AI.

    AI enhances. It doesn’t replace editing skill.

    The Future of AI Upscaling

    We’re moving toward:

    • Real-time enhancement
    • AI scene reconstruction
    • Fully automated pipelines

    Tools like Sora will soon blur the line between “fixing” footage and completely recreating it.

    Final Thoughts: The Real Difference

    Here’s the truth most creators won’t admit:

    Your footage doesn’t need to be perfect.
    It needs to feel high-quality.

    The best AI video upscalers for low-quality mobile footage give you the technical edge—but retention comes from editing decisions.

    So focus on:

    • Clarity
    • Motion
    • Storytelling

    That’s what actually makes videos go viral.

    Your Next Move

    Now it’s your turn.

    Take your worst mobile clip and run it through one of these AI upscalers. Test different settings, experiment with keyframing, and push your editting skills.

    Then post it. Watch the retention. Analyze the data.

    And when you’re ready to go even deeper into AI editing, VFX workflows, and viral storytelling, head over to vfxcut.xyz—the ultimate hub for creators who refuse to stay average.

    Go transform your footage into something people can’t scroll past.

  • How to Swap Faces in Videos Using Free AI Tools 2026 (Go Viral with Pro-Level Edits)

    How to Swap Faces in Videos Using Free AI Tools 2026 (Go Viral with Pro-Level Edits)

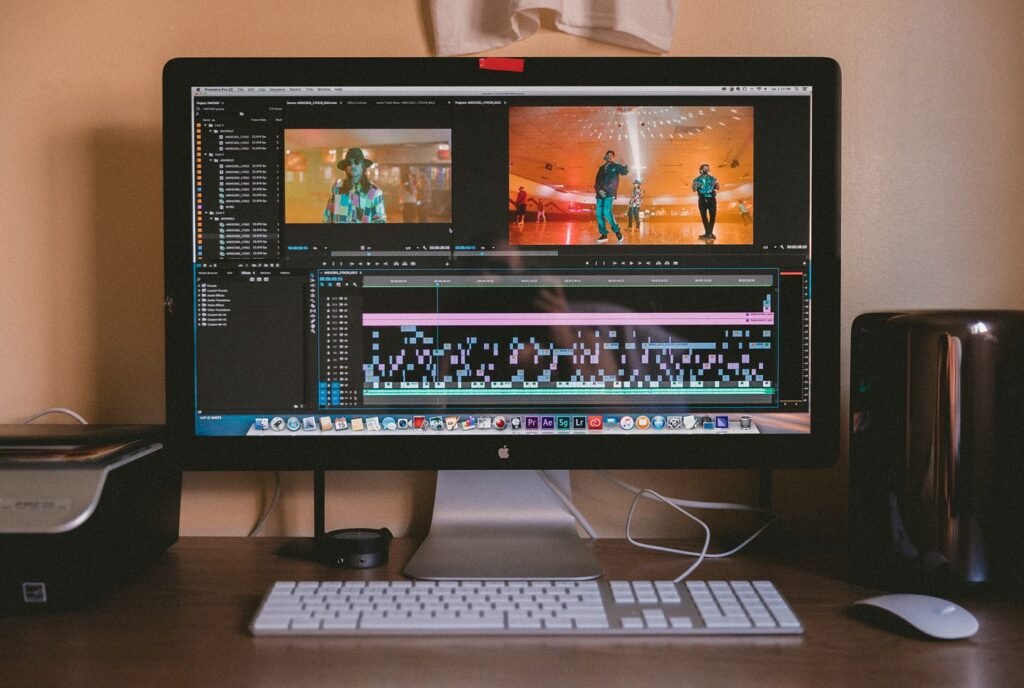
    Look, I’ve spent hours in the editing suite so you don’t have to—and if there’s one thing that’s blowing up short-form content in 2026, it’s AI-powered face swapping. From TikTok skits to cinematic reels, creators are using this technique to create scroll-stopping, high-retention videos without expensive software.

    This guide will walk you through how to swap faces in videos using free AI tools 2026, with a deep dive into workflows, pro techniques, and the “secret sauce” behind viral edits.

    And yes—this is the exact workflow many creators on vfxcut.xyz are using right now.


    Why Face Swapping Is Dominating Short-Form Content

    Here is the real talk about high-retention editing: novelty + realism = watch time.

    Face swapping hits both.

    • It instantly grabs attention in the first 2 seconds
    • Creates curiosity (“Wait… is that real?”)
    • Encourages rewatches (boosting retention metrics)

    In 2026, AI has reached a point where real-time facial tracking, lighting adaptation, and expression mapping are insanely accurate—even on free tools.


    Best Free AI Tools for Face Swapping in 2026

    1. CapCut (AI Face Replace)

    • Built-in AI face swap templates
    • Auto tracking + keyframing support
    • Mobile + desktop workflow
    • Perfect for beginners and fast edits

    2. Runway (Gen-3 Face Tools)

    • Advanced masking and motion tracking
    • Realistic lighting + shadow blending
    • Cloud-based processing
    • Ideal for semi-pro creators

    3. Sora (Experimental Workflows)

    • High-end AI video generation
    • Face swapping via prompt + reference images
    • Best for cinematic content

    4. DeepFaceLab (Free but technical)

    • Open-source
    • Maximum control over training models
    • Requires GPU + patience

    Comparison Table: Best Free Face Swap Tools

    ToolEase of UseRealismSpeedBest For
    CapCut AI⭐⭐⭐⭐⭐⭐⭐⭐⭐FastTikTok/Reels
    Runway⭐⭐⭐⭐⭐⭐⭐⭐⭐MediumCinematic edits
    Sora⭐⭐⭐⭐⭐⭐⭐⭐SlowAdvanced creators
    DeepFaceLab⭐⭐⭐⭐⭐Very SlowPro VFX artists

    Gear & Footage Requirements (Don’t Skip This)

    You don’t need expensive gear, but you do need clean input.

    Footage Checklist:

    • Stable camera (avoid shaky footage)
    • Clear face visibility (no heavy shadows)
    • Neutral lighting (important for color grading later)
    • 1080p minimum resolution

    Face Image Requirements:

    • Front-facing
    • High resolution
    • Similar angle to source footage

    If your input is bad, no AI will save it. That’s just facts.


    Step-by-Step: How to Swap Faces in Videos Using Free AI Tools 2026

    Let’s break this down using CapCut AI + Runway combo workflow (the sweet spot for most creators).

    Step 1: Import Footage into CapCut

    • Open CapCut
    • Create new project
    • Import your base video

    Make sure the subject’s face is clearly visible throughout the clip.


    Step 2: Apply AI Face Swap Template

    • Go to “AI Tools”
    • Select Face Replace / Face Swap
    • Upload your target face

    CapCut will automatically:

    • Detect facial landmarks
    • Apply motion tracking
    • Sync expressions

    This is where beginners stop—but we’re not beginners.


    Step 3: Refine with Keyframing (Pro Move)

    Here’s the secret sauce:

    • Add manual keyframes to adjust alignment
    • Fix drifting edges during movement
    • Match head tilt and rotation

    Most viral edits fail here because people skip this proccess.


    Step 4: Export and Move to Runway

    Export your clip and upload it to Runway for advanced polishing.

    In Runway:

    • Use masking tools to isolate face
    • Apply lighting correction AI
    • Adjust shadow blending

    This step takes your edit from “cool” to “wait… that looks real.”


    Step 5: Color Grading for Seamless Blend

    Color grading is non-negotiable.

    Match:

    • Skin tones
    • Contrast levels
    • Highlights and shadows

    Pro tip: Use LUTs or manual curves to unify the entire frame.


    Step 6: Add Motion Blur & Grain

    Real footage isn’t perfect—so your edit shouldn’t be either.

    Add:

    • Subtle motion blur
    • Film grain
    • Slight noise

    This hides imperfections and boosts realism.


    Settings Checklist (Copy This)

    Use this as your go-to checklist before exporting:

    • Face alignment: ✔
    • Keyframing adjusted: ✔
    • Skin tone matched: ✔
    • Lighting consistent: ✔
    • Motion blur added: ✔
    • Grain/noise applied: ✔
    • Export at 1080p or higher: ✔

    High-Retention Editing Tricks (2026 Strategy)

    If you want your face swap videos to actually perform, not just look cool:

    1. Hook in First 2 Seconds

    Start with:

    • A shocking reveal
    • A familiar face in an unexpected context

    2. Use Fast Cuts

    • Keep clips under 3 seconds
    • Maintain visual momentum

    3. Add Sound Design

    • Whoosh transitions
    • Impact hits
    • Subtle ambient layers

    4. Loop Your Video

    Create seamless loops to increase watch time.


    Common Mistakes (Avoid These)

    Let me save you hours of frustration:

    • Ignoring lighting mismatch → kills realism instantly
    • Over-smoothing faces → looks fake
    • Skipping keyframing → causes face drift
    • Using low-res images → blurry output

    Also, don’t rely 100% on AI. The best results always come from manual tweaks + AI automation.


    Advanced Workflow: Sora-Based Face Swapping

    For those pushing cinematic edits:

    • Use Sora to generate base scene
    • Input reference face
    • Guide output using prompts

    Example:
    “Generate a cinematic close-up with subject resembling [face reference], natural lighting, 4K realism”

    This is still evolving, but it’s the future of AI editting.


    Final Thoughts (Creative Mentor Mode)

    Look—face swapping isn’t just a gimmick anymore. In 2026, it’s a core storytelling tool.

    The creators winning right now aren’t just using AI—they’re combining it with editing fundamentals like timing, color grading, and retention strategy.

    If you master this workflow, your content won’t just look better… it’ll perform better.

    And that’s the real goal.


    Call to Action

    Now it’s your turn.

    Try this workflow, experiment with different faces, and push your creativity. When you get a clean result, share it—and if you want more deep-dive tutorials like this, head over to vfxcut.xyz, the ultimate hub for short-form creators and VFX artists.

    Your next viral edit is one timeline away.

  • How to Automate Short-Form Video Editing with AI Agents (Scale Viral Content Without Burning Out)

    How to Automate Short-Form Video Editing with AI Agents (Scale Viral Content Without Burning Out)

    Look, I’ve spent hours in the editing suite so you don’t have to—and if there’s one shift that’s completely changing short-form content in 2026, it’s this:

    How to automate short-form video editing with AI agents.

    We’re no longer just editing videos. We’re building systems that edit for us.

    If you’re still manually cutting clips, adding captions, doing keyframing, color grading, and sound design one-by-one… your already behind.

    This guide will show you how to automate your entire workflow using tools like CapCut, Runway, and Sora—while still keeping that high-retention, viral editing style.

    And yeah, this is exactly the kind of advanced workflow creators on vfxcut.xyz are using to scale to 10–50 videos per day.


    What Are AI Agents in Video Editing?

    AI agents are not just tools—they’re automated systems that make decisions.

    Instead of:

    • You cutting clips manually
    • You adding subtitles
    • You choosing transitions

    AI agents can:

    • Detect highlights automatically
    • Apply captions and effects
    • Adjust timing for retention
    • Even handle color grading

    Think of it like having a junior editor working 24/7.


    Why Automation Is the New Competitive Edge

    Here is the real talk about high-retention editing:

    Speed = opportunity.

    The more content you publish:

    • The higher your chances of going viral
    • The faster you learn what works
    • The better your retention strategies become

    AI automation lets you:

    • Scale output without burnout
    • Maintain consistent quality
    • Focus on creative direction instead of repetitive tasks

    Best AI Tools for Automating Short-Form Editing

    CapCut (Auto Cut + AI Captions)

    • Auto highlight detection
    • AI-generated captions
    • Templates for viral edits
    • One-click export formats

    Best for: Fast, mobile-first workflows


    Runway (AI Timeline Automation)

    • Smart scene detection
    • Automated masking + object tracking
    • AI color grading tools
    • Cloud-based workflows

    Best for: Semi-pro automation


    Sora (Content Generation + Editing)

    • Generate entire clips
    • Modify scenes via prompts
    • Combine editing + creation

    Best for: Advanced creators


    Descript (AI Editing via Text)

    • Edit video by editing transcript
    • Remove filler words automatically
    • Auto jump cuts

    Comparison Table: Automation Tools in 2026

    ToolAutomation LevelEase of UseSpeedBest For
    CapCut AI⭐⭐⭐⭐⭐⭐⭐⭐⭐⭐FastSocial content
    Runway⭐⭐⭐⭐⭐⭐⭐⭐MediumPro edits
    Sora⭐⭐⭐⭐⭐⭐⭐⭐SlowCinematic
    Descript⭐⭐⭐⭐⭐⭐⭐⭐⭐FastTalking videos

    The AI Automation Workflow (Big Picture)

    Before we go step-by-step, understand this pipeline:

    1. Input footage
    2. AI selects highlights
    3. AI cuts and trims
    4. AI adds captions + effects
    5. You refine (keyframing, color grading)
    6. Export + publish

    Notice something?

    You’re not removed—you’re elevated.


    Step-by-Step: How to Automate Short-Form Video Editing with AI Agents

    Let’s break this down into a real-world workflow you can start using today.


    Step 1: Feed Raw Footage into CapCut AI

    • Import long-form content
    • Use Auto Cut feature

    CapCut will:

    • Detect engaging moments
    • Remove dead space
    • Create short clips

    This alone can save hours of editting time.


    Step 2: Generate AI Captions Automatically

    Captions = retention boost.

    In CapCut:

    • Enable Auto Captions
    • Choose dynamic subtitle styles

    Pro tip:
    Use bold keywords and animated text to keep attention.


    Step 3: Use AI Templates for Structure

    Instead of building edits from scratch:

    • Apply viral templates
    • Let AI handle transitions and pacing

    Templates are trained on high-performing content—use them.


    Step 4: Move to Runway for Advanced Automation

    Upload your clip to Runway and:

    • Use scene detection AI
    • Apply automated tracking
    • Enhance visuals using AI color grading

    Runway is where your edit goes from “good” to “polished.”


    Step 5: Fine-Tune with Manual Keyframing

    Here’s the truth most people ignore:

    AI gets you 80% there.

    The final 20%—that’s where viral edits are made.

    • Adjust zooms with keyframing
    • Refine timing for punchlines
    • Sync cuts to audio beats

    This step is small but powerful.


    Step 6: Export and Optimize for Platforms

    • Export in vertical (9:16)
    • Keep duration under 30–60 seconds
    • Optimize bitrate for platform

    Different platforms, same principle: clarity + speed.


    Automation Settings Checklist

    Before hitting export, run this:

    • Auto cuts reviewed: ✔
    • Captions styled properly: ✔
    • Keyframing refined: ✔
    • Color grading consistent: ✔
    • Audio synced: ✔
    • Hook within 2 seconds: ✔
    • Loopable ending: ✔

    High-Retention Automation Strategies

    Automation is useless if your content doesn’t perform.

    1. Hook Optimization

    Train your AI workflow by:

    • Always placing strongest moment first
    • Cutting slow intros

    2. Pattern Interrupts

    Use:

    • Zoom-ins
    • Sound effects
    • Text pop-ups

    Even AI agents can be guided to apply these.


    3. Loop Engineering

    Make your ending connect to your beginning.

    This increases watch time like crazy.


    4. Batch Production

    Don’t edit one video.

    Edit 10–20 at once using AI workflows.

    This is how creators scale.


    Common Mistakes (Don’t Do This)

    Let me be blunt:

    • Over-automating everything → robotic content
    • Ignoring storytelling → no retention
    • Skipping manual refinement → low quality
    • Using default captions → boring visuals

    Also, don’t trust AI blindly. It’s a tool—not your creative brain.


    Advanced Workflow: AI Agent Chains

    Now we’re getting serious.

    You can chain AI tools like this:

    1. CapCut → Auto cuts + captions
    2. Runway → Visual enhancement
    3. Sora → Scene generation or replacement
    4. Final polish → Manual keyframing + grading

    This creates a semi-automated editing pipeline.

    Some creators are even integrating APIs to fully automate this proccess.


    Final Thoughts (Creative Mentor Mode)

    Look—learning how to automate short-form video editing with AI agents is no longer optional.

    It’s the difference between:

    • Posting occasionally
    • And dominating your niche

    But here’s the truth most won’t tell you:

    Automation doesn’t replace creativity. It amplifies it.

    If your ideas are weak, automation won’t save you. But if your ideas are strong? You’ll scale faster than ever.

    And that’s the game in 2026.


    Call to Action

    Now it’s your move.

    Start building your AI editing workflow today. Test it, refine it, and push it until your creating content faster than you ever thought possible.

    And if you want more pro-level strategies, workflows, and insider techniques, head over to vfxcut.xyz—the ultimate hub for short-form creators and VFX artists.

    Your next viral system isn’t just about editing. It’s about automation.

  • Using AI to Remove Unwanted Objects from Video Frames (Create Clean, Viral Edits Fast)

    Using AI to Remove Unwanted Objects from Video Frames (Create Clean, Viral Edits Fast)

    Look, I’ve spent hours in the editing suite so you don’t have to—and if there’s one technique that quietly separates amateur edits from viral-level content in 2026, it’s this:

    Using AI to remove unwanted objects from video frames.

    We’re talking about removing photobombers, wires, logos, trash, random people—basically anything killing your shot’s aesthetic or storytelling.

    And here is the real talk about high-retention editing: clean visuals = higher retention. If your viewer notices distractions, they drop off. If your frame feels intentional and cinematic, they stay.

    This guide breaks down everything—from tools like CapCut and Runway to advanced workflows using Sora—so you can remove objects like a pro.

    And yes, this is exactly the kind of deep workflow you’ll find on vfxcut.xyz, the go-to hub for serious creators.


    Why Object Removal Is a Viral Editing Advantage in 2026

    AI object removal isn’t just cleanup—it’s story control.

    When you remove distractions:

    • Your subject becomes the focus instantly
    • Your composition feels intentional
    • Your content looks higher-budget

    In short-form content, especially TikTok and Reels, every frame matters. Clean visuals boost:

    • Watch time
    • Loop rate
    • Overall retention

    Best AI Tools for Removing Objects from Video

    CapCut (AI Remove / Retouch)

    • One-tap object removal
    • Built-in tracking (basic keyframing)
    • Fast processing on mobile
    • Best for quick social edits

    Runway (Inpainting + Motion Tracking)

    • Advanced object removal via masking
    • Frame-by-frame AI reconstruction
    • Better for complex backgrounds
    • Cloud-powered rendering

    Sora (Next-Gen Scene Regeneration)

    • Rebuilds entire scenes with AI
    • Removes objects via prompt-based editing
    • Insane realism (still evolving)

    Adobe After Effects + AI Plugins

    • Combines manual masking + AI tools
    • High control using keyframing
    • Industry-level results

    Comparison Table: AI Object Removal Tools

    ToolEase of UseAccuracySpeedBest Use Case
    CapCut AI⭐⭐⭐⭐⭐⭐⭐⭐⭐FastQuick edits
    Runway⭐⭐⭐⭐⭐⭐⭐⭐⭐MediumPro content
    Sora⭐⭐⭐⭐⭐⭐⭐⭐SlowCinematic
    After Effects⭐⭐⭐⭐⭐⭐⭐SlowAdvanced VFX

    Gear & Footage Optimization (Critical for AI Success)

    Before we even touch software—your footage matters more than the tool.

    Shoot Like an Editor (Not Just a Creator)

    • Keep camera stable (tripod if possible)
    • Avoid overlapping objects with subject
    • Maintain consistent lighting
    • Use higher shutter speeds for clarity

    Why This Matters

    AI works by predicting missing pixels. If your footage is messy, the AI guesses wrong—and your result looks fake.

    Bad input = bad output. No exceptions.


    Step-by-Step: Using AI to Remove Unwanted Objects from Video Frames

    Let’s break down a CapCut + Runway hybrid workflow—this is what most high-performing creators are using right now.


    Step 1: Import Footage into CapCut

    • Open CapCut
    • Create a new project
    • Import your clip

    Trim the section where the unwanted object appears. Keep your timeline clean—this helps later.


    Step 2: Use AI Remove Tool

    • Select your clip
    • Go to “AI Tools” → “Remove Object”
    • Highlight the unwanted object

    CapCut will:

    • Track the object
    • Replace it using surrounding pixels
    • Smooth the area automatically

    Quick tip: Don’t over-select. Smaller masks = cleaner results.


    Step 3: Refine with Keyframing

    This is where most creators mess up.

    • Add manual keyframes to adjust mask position
    • Track movement frame-by-frame if needed
    • Ensure the mask sticks to the object

    If you skip this, your edit will drift—and viewers will notice.


    Step 4: Export and Enhance in Runway

    Now take it up a level.

    Upload your clip to Runway and:

    • Use inpainting tools
    • Refine edges around removed object
    • Let AI rebuild missing textures

    Runway is especially powerful for:

    • Moving backgrounds
    • Complex textures (grass, water, crowds)

    Step 5: Fix Artifacts with Color Grading

    Even if the removal looks good, subtle inconsistencies can break realism.

    Match:

    • Exposure
    • Contrast
    • White balance

    Use color grading tools to blend everything seamlessly.


    Step 6: Add Motion Blur & Noise

    Here’s the secret sauce most tutorials skip:

    Real footage has imperfections.

    Add:

    • Motion blur (for moving shots)
    • Film grain
    • Slight noise

    This hides AI artifacts and boosts realism.


    Settings Checklist (Save This)

    Before exporting, run through this checklist:

    • Object fully removed: ✔
    • Mask properly tracked: ✔
    • Keyframing refined: ✔
    • No visible artifacts: ✔
    • Color grading matched: ✔
    • Motion blur applied: ✔
    • Export in 1080p or higher: ✔

    High-Retention Editing Techniques (2026 Playbook)

    Removing objects is just step one—turn it into a viral asset.

    1. Before/After Hook

    Start your video with:

    • “Watch this…”
    • Show original messy frame
    • Then reveal clean version

    Instant curiosity boost.


    2. Use Jump Cuts

    • Cut between raw and edited shots
    • Keep pacing tight
    • Maintain visual energy

    3. Add Sound Design

    Don’t ignore audio.

    Use:

    • Whooshes for transitions
    • Subtle ambient sounds
    • Impact hits for reveals

    4. Loop the Final Shot

    Loopable edits increase watch time massively.

    Make the end match the beginning.


    Common Mistakes (Avoid These)

    Let me save your time:

    • Overusing AI without manual fixes
    • Ignoring lighting mismatches
    • Using large masks (causes blur)
    • Skipping color grading

    Also—don’t rush the proccess. Clean edits take time.


    Advanced Workflow: Sora for Scene Reconstruction

    For next-level creators:

    Use Sora to:

    • Regenerate entire scenes
    • Remove objects via prompts
    • Rebuild backgrounds realistically

    Example prompt:
    “Remove foreground object and reconstruct background with natural lighting, cinematic quality”

    This is the future of AI editting—and it’s only getting better.


    Final Thoughts (Creative Mentor Mode)

    Look—using AI to remove unwanted objects from video frames is no longer optional. It’s a core skill.

    The creators who win in 2026 aren’t just shooting content—they’re perfecting every frame.

    And the difference between a scroll-past video and a viral one?

    Tiny details your audience doesn’t even consciously notice.

    Master this workflow, and your content will feel cleaner, more intentional, and way more professional—even if your using free tools.


    Call to Action

    Now it’s your turn.

    Open your editing app, take a messy clip, and clean it up using this workflow. Experiment, refine, and push your limits.

    When you nail it, share your results—and for more pro-level breakdowns, visit vfxcut.xyz, the ultimate hub for short-form creators and VFX artists.

    Your next viral edit is hiding in the details.

  • Best AI Background Music Generators for Copyright-Free Reels (Create Viral Audio That Hooks Instantly)

    Best AI Background Music Generators for Copyright-Free Reels (Create Viral Audio That Hooks Instantly)

    Look, I’ve spent hours in the editing suite so you don’t have to—and if there’s one thing most creators still underestimate, it’s this:

    Your background music can make or break your reel.

    In 2026, visuals get attention… but audio drives retention.

    If your sound design is weak, your viewer scrolls. If your music hits emotionally and matches your cuts, they stay—and sometimes even loop your video.

    This is where AI background music generators for copyright-free reels come in. They let you create custom, platform-safe music that perfectly fits your pacing, transitions, and storytelling.

    And yeah, this is exactly the kind of pro-level workflow we break down daily on vfxcut.xyz, the ultimate hub for short-form creators.


    Why AI Music Is Dominating Short-Form Content

    Here is the real talk about high-retention editing:

    Most creators pick random trending sounds.

    Smart creators design sound intentionally.

    AI music generators allow you to:

    • Match music to your video timing
    • Avoid copyright claims completely
    • Create unique audio (no oversaturation)
    • Control mood, tempo, and drops

    That last one? Huge for keyframing and cut timing.


    Best AI Background Music Generators for Copyright-Free Reels (2026)

    Let’s break down the tools that actually work.


    Soundraw

    • Generates fully customizable tracks
    • Control mood, genre, length, and intensity
    • Export royalty-free music

    Best for: Creators who want precise control over vibe and structure


    Mubert

    • Real-time AI music generation
    • Huge library of copyright-free sounds
    • API support for automation

    Best for: Fast workflows and continuous content creation


    AIVA

    • Composes cinematic-level music
    • Advanced editing options
    • Ideal for storytelling and emotional content

    Best for: High-quality, film-style reels


    Boomy

    • One-click music generation
    • Beginner-friendly
    • Quick export options

    Best for: Rapid content production


    CapCut (AI Music Integration)

    • Built-in copyright-safe music
    • Auto-sync with edits
    • Works seamlessly with captions and cuts

    Best for: All-in-one mobile creators


    Comparison Table: AI Music Generators

    ToolCustomizationEase of UseSpeedBest For
    Soundraw⭐⭐⭐⭐⭐⭐⭐⭐⭐FastPro control
    Mubert⭐⭐⭐⭐⭐⭐⭐⭐⭐Very FastAutomation
    AIVA⭐⭐⭐⭐⭐⭐⭐⭐MediumCinematic
    Boomy⭐⭐⭐⭐⭐⭐⭐⭐FastBeginners
    CapCut⭐⭐⭐⭐⭐⭐⭐⭐FastMobile edits

    How Music Impacts Retention (This Is Critical)

    Let me break this down like a mentor would:

    • First 2 seconds: Music sets emotional tone
    • Mid-section: Beat drives pacing and engagement
    • Ending: Drop or loop determines rewatchability

    If your cuts don’t match your music, your retention drops instantly.

    That’s why AI-generated music is powerful—it adapts to your edit.


    Step-by-Step: Creating Copyright-Free Music for Reels

    Let’s walk through a real workflow using Soundraw + CapCut.


    Step 1: Generate Music in Soundraw

    • Select mood (e.g., energetic, emotional)
    • Choose genre (trap, cinematic, lo-fi)
    • Set duration (match your video length)

    Generate multiple variations.

    Don’t settle for the first one—this is where your creative direction matters.


    Step 2: Customize Structure

    Here’s where pros stand out:

    • Adjust intensity curve
    • Add drops where key moments happen
    • Align beats with transitions

    Think like this:
    Your music should support your cuts, not fight them.


    Step 3: Export and Import into CapCut

    • Export your track
    • Import into CapCut timeline

    Now sync your visuals.


    Step 4: Sync Cuts with Beats (Keyframing Strategy)

    This is the secret sauce.

    • Place cuts on beat drops
    • Use keyframing for zooms and motion
    • Match transitions to rhythm

    Even simple edits look pro when synced properly.


    Step 5: Add Sound Design Layers

    Music alone isn’t enough.

    Add:

    • Whooshes
    • Impacts
    • Ambient sounds

    Layering audio creates depth and realism.


    Step 6: Final Audio Mixing

    Balance everything:

    • Lower music volume under dialogue
    • Boost key moments
    • Normalize audio levels

    Bad audio mixing ruins even the best visuals.


    Settings Checklist (Use This Every Time)

    Before exporting your reel:

    • Music matches video mood: ✔
    • Beats aligned with cuts: ✔
    • Keyframing synced to rhythm: ✔
    • Sound effects layered: ✔
    • Audio levels balanced: ✔
    • No copyright issues: ✔

    High-Retention Audio Techniques (2026 Trends)

    If you want your reels to actually perform, do this:

    1. Micro Beat Drops

    Instead of one big drop, use multiple smaller ones.

    Keeps attention high throughout.


    2. Loop-Friendly Endings

    Make your ending connect back to the start.

    This increases watch time massively.


    3. Silence as a Tool

    Brief silence before a drop = more impact.

    Most creators ignore this.


    4. Dynamic Audio Editting

    Change volume and intensity throughout the video.

    Flat audio = boring content.


    Common Mistakes (Avoid These)

    Let me save you some headaches:

    • Using random music that doesn’t match visuals
    • Ignoring beat sync
    • Overloading sound effects
    • Not checking copyright status

    Also—don’t rely only on AI. You still need to guide the creative direction.


    Advanced Workflow: AI + Automation

    Now let’s take it up a level.

    You can combine:

    • AI music generators (Soundraw, Mubert)
    • Editing tools like CapCut
    • Automation tools for batch production

    This creates a system where:

    • Music is generated automatically
    • Edits are synced faster
    • Output scales massively

    This is how creators are posting 20+ reels daily.


    Final Thoughts (Creative Mentor Mode)

    Look—the best AI background music generators for copyright-free reels aren’t just tools. They’re creative weapons.

    If you master audio:

    • Your edits feel more professional
    • Your retention increases
    • Your content stands out instantly

    Most people focus on visuals. The smart ones master sound.

    And once you get this right, your content hits different.


    Call to Action

    Now it’s your turn.

    Pick one AI music generator, create a custom track, and build a reel around it. Experiment with beats, drops, and timing.

    When you nail it, share your edit—and if you want more advanced breakdowns, workflows, and insider tips, check out vfxcut.xyz.

    Your next viral reel isn’t just about visuals. It’s about how it sounds.