Blog

  • How to Use CapCut 3D Zoom Effect for Viral Reels (2026 Expert Breakdown for High-Retention Edits)

    How to Use CapCut 3D Zoom Effect for Viral Reels (2026 Expert Breakdown for High-Retention Edits)

    Learn how to use CapCut 3D zoom effect for viral reels with pro VFX tips, AI tools, and high-retention editing strategies.

    If you’ve been scrolling TikTok or Instagram Reels in 2026, you’ve probably noticed one thing—videos with the 3D zoom effect are absolutely dominating. They feel cinematic, dynamic, and insanely engaging. But here’s the truth most beginners miss: it’s not just the effect—it’s how you time it.

    Look, I’ve spent hours in the editing suite so you don’t have to figuring out what actually makes people stop scrolling. And I can tell you this with confidence: the CapCut 3D zoom effect is one of the easiest ways to boost retention if you use it correctly.

    In this guide, I’ll break down exactly how to use CapCut 3D zoom effect for viral reels, plus the pro-level tricks editors are using in 2026 with AI tools like Runway, Sora, and CapCut AI enhancements.

    This is not beginner fluff—this is real-world editing strategy from someone who understands short-form virality.


    Why the 3D Zoom Effect Goes Viral in 2026

    Before jumping into editing, you need to understand why this works.

    The 3D zoom effect creates:

    • Depth illusion (parallax motion)
    • Instant visual hook in first 1–2 seconds
    • Emotional intensity through motion acceleration
    • Attention retention via continuous movement

    In short: it tricks the brain into staying longer.

    Platforms like TikTok and Instagram prioritize watch time, so anything that improves retention gets boosted.


    Software Stack for 3D Zoom Editing (2026 Setup)

    You don’t need a Hollywood studio. But you do need the right tools:

    • CapCut – Main editing platform
    • Runway ML – AI background enhancement
    • Sora – AI motion simulation (advanced users)
    • Adobe Premiere Pro – Optional pro-level refinement

    But 90% of viral reels are still made inside CapCut.


    CapCut vs Premiere Pro for 3D Zoom Effects

    FeatureCapCutPremiere Pro
    Ease of UseVery easyAdvanced
    3D Zoom ToolsBuilt-in presetsManual keyframing
    AI Integration (2026)StrongModerate
    Speed for ReelsFast workflowSlower
    Best ForViral contentProfessional film

    For short-form content, CapCut wins almost every time.


    Step-by-Step: How to Use CapCut 3D Zoom Effect for Viral Reels

    Step 1: Import Your Clip

    Open CapCut and:

    • Import a high-resolution video (1080p or 4K recommended)
    • Choose clips with clear subject focus (face, object, movement)

    Avoid messy backgrounds—clean visuals perform better.


    Step 2: Apply the 3D Zoom Effect

    Go to:

    • Effects → Video Effects → 3D Zoom

    Apply the effect and preview it.

    This creates a depth-mapping motion layer automatically.


    Step 3: Adjust Keyframes for Motion Control

    Now comes the pro part.

    Open keyframe editor:

    • Set starting zoom at 100%
    • End zoom between 110%–130%
    • Slight rotation (2–5 degrees max)

    This creates cinematic movement without looking overdone.

    Here is the real talk about high-retention editing: subtle motion beats aggressive motion almost every time.


    Step 4: Add AI Motion Enhancement (2026 Trick)

    Use CapCut AI or Runway ML:

    • Enhance subject separation
    • Smooth background motion
    • Add depth blur layers

    This makes the 3D illusion more realistic.


    Step 5: Sync With Beat (Retention Hack)

    Use music with strong beat drops.

    Then:

    • Cut zoom peaks on beat drops
    • Increase motion speed during transitions

    This is where virality happens.


    Step 6: Add Color Grading for Cinematic Feel

    Use:

    • Contrast boost (+10–20%)
    • Saturation slightly reduced
    • Warm highlights

    This improves emotional engagement.

    Even basic color grading can increase watch time significantly.


    Step 7: Add Text Hooks (First 2 Seconds)

    Examples:

    • “Wait for it…”
    • “You’ve never seen this before”
    • “Don’t scroll…”

    These hooks increase retention dramatically.


    Step 8: Export Settings

    Best settings for viral reels:

    • Resolution: 1080×1920
    • FPS: 30 or 60
    • Bitrate: High

    Never compress too much—quality matters.


    Pro Tips from a 10+ Year VFX Editor

    1. Don’t Overuse 3D Zoom

    Too much zoom = viewer fatigue.

    2. Combine With Speed Ramping

    Slow → fast transitions increase engagement.

    3. Layer With Subtle Shake

    Micro shake adds realism.

    4. Use AI Background Fill

    Tools like Sora and Runway can extend scenes visually.


    Common Mistakes Beginners Make

    Mistake 1: Over-zooming

    More zoom does NOT mean more virality.

    Mistake 2: Ignoring Audio Sync

    Bad sync kills retention instantly.

    Mistake 3: Using Low-Quality Clips

    Blurry footage reduces algorithm reach.

    Mistake 4: No Story Structure

    Even 10-second reels need micro-storytelling.


    High-Retention Formula (Simple Breakdown)

    Here’s the formula I personally use:

    HOOK (0–2s) + MOTION (3D Zoom) + BEAT SYNC + VISUAL REVEAL = VIRAL POTENTIAL

    If one element is missing, performance drops.


    Why CapCut Dominates in 2026

    CapCut has evolved into a full AI-powered editing system:

    • Auto keyframing
    • Smart motion tracking
    • AI scene detection
    • Instant viral templates

    This is why creators rely on it for fast content production.


    Where vfxcut.xyz Fits In

    If you’re serious about editing, platforms like vfxcut.xyz are built to help you master techniques like this faster.

    We break down:

    • Viral editing patterns
    • AI-powered workflows
    • Advanced VFX breakdowns
    • Real creator strategies

    Not theory—real execution.


    Final Thoughts

    The CapCut 3D zoom effect for viral reels is not just a trend—it’s a core visual language of short-form content in 2026.

    But remember this:

    Tools don’t go viral. Editors do.

    Your creativity, timing, and storytelling decide whether your video gets 500 views or 5 million.


    Call to Action

    Start experimenting with the 3D zoom effect today. Try different keyframe styles, test beat syncs, and refine your visual storytelling.

    Then explore more advanced editing breakdowns on vfxcut.xyz, your ultimate hub for short-form creators and VFX enthusiasts.

    Now go create something scroll-stopping.

  • Best CapCut Export Settings for 4K 60fps TikToks (2026 Pro VFX Guide for Viral Quality)

    Best CapCut Export Settings for 4K 60fps TikToks (2026 Pro VFX Guide for Viral Quality)

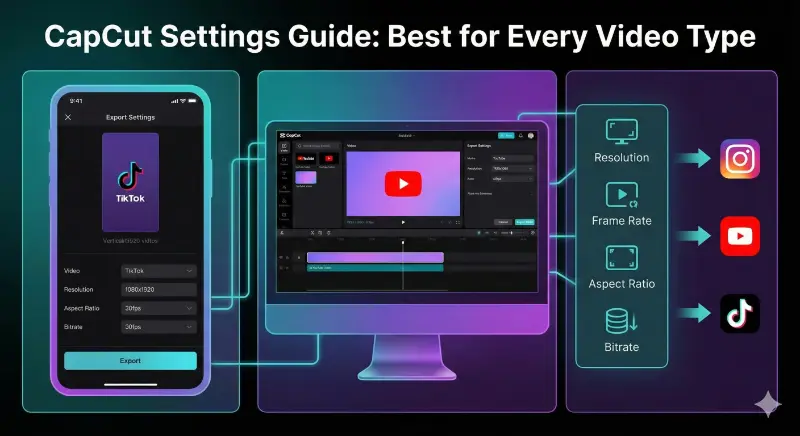
    Learn the best CapCut export settings for 4K 60fps TikToks with pro VFX workflow, retention tips, and AI editing insights.


    If you’ve ever uploaded a perfectly edited video to TikTok only to see it come out blurry, compressed, or just… disappointing, you’re not alone.

    Look, I’ve spent hours in the editing suite so you don’t have to, and I can tell you one thing with absolute certainty: export settings decide whether your video looks viral or amateur.

    In 2026, TikTok’s compression algorithm is smarter than ever. That means your export settings in CapCut are now just as important as your editing itself.

    This guide breaks down the Best CapCut export settings for 4K 60fps TikToks, plus pro-level tweaks used by high-end short-form creators and VFX artists.


    Why Export Settings Matter More in 2026

    TikTok, Instagram Reels, and YouTube Shorts now use adaptive AI compression.

    That means:

    • Low-quality exports get heavily compressed again
    • High-quality exports retain more detail
    • Wrong bitrate = blurry edges + broken motion

    Even if your editing is perfect with keyframing, color grading, and transitions, bad export settings can kill retention instantly.

    Here is the real talk about high-retention editing: export is the final boss fight.


    Ideal Software Workflow for 4K 60fps Editing

    Before export, your pipeline matters.

    Most professionals use:

    • CapCut – Fast AI editing + mobile workflow
    • Adobe Premiere Pro – Advanced color grading & precision edits
    • Runway ML – AI background enhancement
    • Sora – AI-generated cinematic clips

    But 80% of viral TikToks are still fully edited in CapCut because of speed and AI features.


    CapCut vs Premiere Pro Export Performance (4K 60fps TikTok)

    FeatureCapCutPremiere Pro
    Export SpeedVery FastModerate
    4K 60fps StabilityHighVery High
    TikTok OptimizationAuto preset supportManual setup
    AI Compression HandlingBuilt-in smart exportExternal plugins needed
    Beginner FriendlyExcellentComplex

    For TikTok creators, CapCut is the fastest path to high-quality output.


    Best CapCut Export Settings for 4K 60fps TikToks

    Let’s go step by step.

    Step 1: Resolution Settings

    Set resolution to:

    • 4K UHD (3840×2160) if your footage supports it
    • Otherwise, 1080×1920 vertical (optimized for TikTok)

    Important: TikTok still compresses everything, but 4K gives it more data to work with.


    Step 2: Frame Rate (CRITICAL)

    Set frame rate to:

    • 60fps (recommended for motion-heavy edits)
    • 30fps (only for cinematic or slow content)

    60fps is the standard for viral edits in 2026 because:

    • Smoother motion
    • Better slow-motion replays
    • Higher perceived quality

    Step 3: Bitrate Settings (MOST IMPORTANT)

    This is where most creators mess up.

    Recommended settings:

    • 4K 60fps → 40–60 Mbps
    • 1080p 60fps → 20–35 Mbps

    If bitrate is too low:

    • Video looks compressed
    • Edges become blurry
    • Motion artifacts appear

    If bitrate is too high:

    • File becomes too large
    • TikTok re-compresses aggressively

    Balance is everything.


    Step 4: Codec Selection

    Use:

    • H.264 (best compatibility)
    • H.265 (HEVC) for smaller file size with better quality

    In most cases, H.265 gives better compression efficiency in CapCut exports.


    Step 5: Color Space Settings

    Set to:

    • SDR (Standard Dynamic Range) for TikTok stability
    • Avoid HDR unless specifically needed

    HDR often causes unpredictable brightness shifts after upload.


    Step 6: Audio Settings

    • Sample Rate: 48kHz
    • Bitrate: 320kbps
    • Stereo output recommended

    Audio clarity is underrated but massively affects retention.


    Pro Export Checklist (2026 Standard)

    Before exporting, check:

    • ✔ 4K resolution enabled
    • ✔ 60fps selected
    • ✔ Bitrate between 40–60 Mbps
    • ✔ H.264 or H.265 codec
    • ✔ No HDR unless required
    • ✔ Audio synced properly
    • ✔ No unnecessary filters added post-export

    AI Export Optimization (New 2026 Trick)

    Modern CapCut AI systems now include smart export features.

    When enabled:

    • AI detects motion complexity
    • Automatically adjusts bitrate zones
    • Reduces compression artifacts
    • Enhances facial clarity in fast motion

    Combine this with tools like Runway ML for even cleaner motion scenes.


    Common Export Mistakes (That Kill Viral Reach)

    Mistake 1: Exporting at Too Low Bitrate

    This is the #1 reason videos look “cheap”.

    Mistake 2: Using Wrong Frame Rate

    Mixing 30fps clips in 60fps export causes jitter.

    Mistake 3: Over-Compressing Before Upload

    Double compression destroys quality.

    Mistake 4: Ignoring Color Grading Before Export

    Poor grading = flat visuals = low retention.

    Even small mistakes can reduce watch time drastically.


    Advanced VFX Editor Tips (From Real Experience)

    1. Always Match Timeline FPS to Export FPS

    If your timeline is 60fps, your export must also be 60fps.

    2. Use Motion Blur Subtly

    Adds cinematic realism without hurting clarity.

    3. Keep Sharp Edges Clean

    Avoid over-sharpening—it creates compression artifacts.

    4. Test Uploads Before Final Posting

    Always upload a private test version to check compression.


    Why 4K 60fps Is Dominating TikTok in 2026

    The algorithm now favors:

    • Smooth motion content
    • High clarity visuals
    • AI-enhanced video stability

    4K 60fps gives:

    • Better zoom quality
    • Cleaner motion transitions
    • Stronger viewer retention

    And retention is everything.


    Where vfxcut.xyz Comes In

    At vfxcut.xyz, we break down real-world editing systems used by viral creators—not theory, but actual workflows.

    From:

    • Keyframing secrets
    • Color grading breakdowns
    • AI-powered editing pipelines
    • Viral retention structures

    This is your hub if you want to go beyond basic edits.


    Final Thoughts

    The Best CapCut export settings for 4K 60fps TikToks are not just technical values—they are a creative strategy.

    You can have perfect edits, smooth transitions, and cinematic keyframes, but if your export is wrong, the algorithm will punish your content.

    Remember this:

    Editing gets attention. Export keeps it.


    CTA

    Now it’s your turn.

    Try these export settings in your next reel, experiment with bitrate and FPS combinations, and observe how your retention changes.

    Then explore more advanced breakdowns and viral editing techniques on vfxcut.xyz, your ultimate hub for short-form creators and VFX enthusiasts.

    Go create something that actually looks as good as it should.

  • How to Remove Video Background in CapCut Without Green Screen (2026 AI VFX Master Guide for Viral Shorts)

    How to Remove Video Background in CapCut Without Green Screen (2026 AI VFX Master Guide for Viral Shorts)

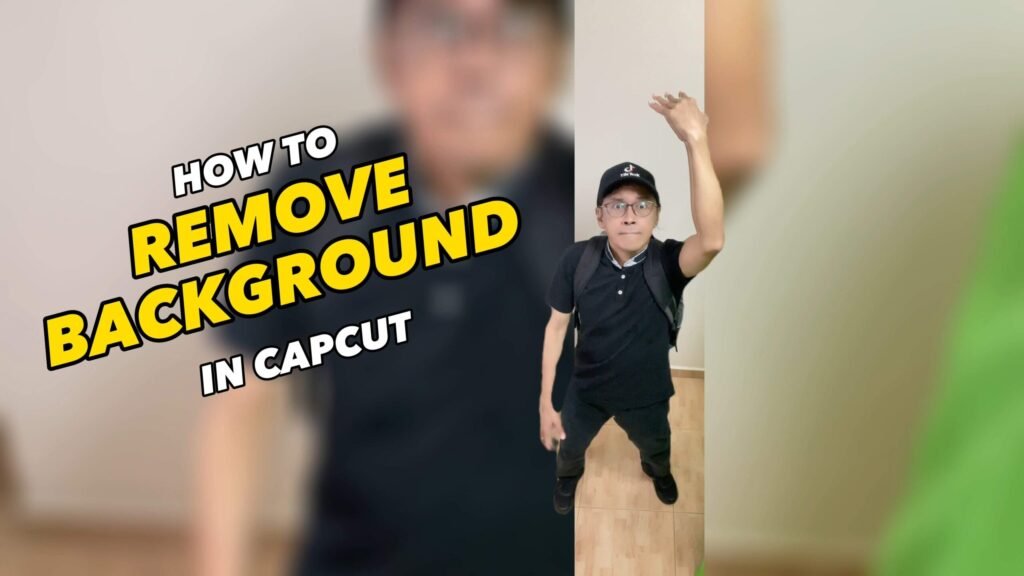
    Learn how to remove video background in CapCut without green screen using AI tools, pro VFX tricks, and 2026 editing techniques.


    If you’ve ever tried shooting a cinematic reel but didn’t have a green screen, you’re not alone.

    In 2026, creators are producing high-quality VFX content straight from their phones—no studio setup, no expensive gear, no green backdrop.

    And here’s the real breakthrough: you can now remove video background in CapCut without green screen using AI-powered segmentation tools that rival desktop software.

    Look, I’ve spent hours in the editing suite so you don’t have to, testing every possible workflow—from manual masking to full AI cutouts—and I can confidently say this: modern CapCut has completely changed the game.

    Let’s break it down like a professional VFX artist would.


    Why Background Removal Is Going Viral in 2026

    Short-form content platforms like TikTok and Instagram Reels are now prioritizing:

    • Clean subject isolation
    • Dynamic scene replacement
    • AI-generated environments
    • High visual contrast storytelling

    Background removal is no longer just a “VFX trick”—it’s a storytelling tool.

    It lets you:

    • Place yourself in cinematic environments
    • Create floating subject effects
    • Build AI-enhanced storytelling scenes
    • Boost visual retention instantly

    And retention = algorithm reach.


    Tools Used for AI Background Removal (2026 Workflow)

    Modern editors don’t rely on green screens anymore. Instead, they use AI-powered segmentation.

    Primary tools:

    • CapCut – Main AI background removal tool
    • Runway ML – Advanced subject isolation + background generation
    • Sora – AI cinematic environment creation
    • Adobe Premiere Pro – Professional compositing and cleanup

    But for 90% of creators, CapCut alone is enough.


    CapCut vs Premiere Pro for Background Removal

    FeatureCapCutPremiere Pro
    AI Background RemovalBuilt-in (Auto Cutout)Requires plugins or manual masking
    Ease of UseVery easyAdvanced
    SpeedFast mobile workflowSlower desktop process
    Accuracy (2026 AI)High for short-formExtremely high with manual work
    Best ForTikTok/Reels creatorsFilm/VFX professionals

    If your goal is viral content, CapCut wins in speed and efficiency.


    How to Remove Video Background in CapCut Without Green Screen

    Now let’s go step by step like a real editor would.


    Step 1: Import Your Footage

    Open CapCut and:

    • Import a clear video (good lighting is critical)
    • Make sure subject is visible and not heavily blurred
    • Avoid cluttered backgrounds if possible

    Even though AI works well, clean input = better output.


    Step 2: Use AI Auto Cutout Feature

    Go to:

    • Cutout → Auto Cutout (or AI Remove Background)

    CapCut will:

    • Detect human subject
    • Separate foreground from background
    • Generate a transparent layer

    This is powered by AI segmentation models similar to Runway-style tracking.

    Here is the real talk about high-retention editing: clean isolation instantly increases perceived production value.


    Step 3: Refine Edge Masking

    AI is powerful, but not perfect.

    Adjust:

    • Edge feathering (5–15%)
    • Hair refinement tool
    • Shadow smoothing

    Small imperfections can ruin realism if not corrected.


    Step 4: Replace Background (Creative Layering)

    Now the fun part.

    You can replace backgrounds with:

    • Cinematic cityscapes
    • Abstract motion graphics
    • AI-generated environments
    • Gradient or neon backdrops

    For advanced creators, use Runway ML to generate custom backgrounds.


    Step 5: Add Depth & Motion (Pro Trick)

    To make it look real:

    • Add slight background blur
    • Apply parallax movement
    • Animate slow zoom in/out
    • Add motion shake (very subtle)

    This creates depth illusion and increases retention.


    Step 6: Color Grading for Realism

    This step is where most beginners fail.

    Apply:

    • Match foreground and background tones
    • Adjust contrast to unify layers
    • Reduce harsh saturation differences

    If lighting doesn’t match, viewers instantly notice.


    Step 7: Add Keyframes for Cinematic Movement

    Use keyframing to:

    • Slightly scale subject in motion
    • Add rotation (1–3 degrees max)
    • Sync movement with beats

    This turns static cutouts into dynamic storytelling scenes.


    Step 8: AI Enhancement (2026 Upgrade Trick)

    CapCut AI now includes:

    • Smart lighting correction
    • Background harmonization
    • Subject sharpening
    • Motion stabilization

    Combine this with tools like Sora for hyper-realistic scene generation.


    Pro VFX Editor Tips (From Real Experience)

    1. Lighting Match Is Everything

    If subject lighting doesn’t match background, realism breaks instantly.

    2. Avoid Over-Feathering Edges

    Too much blur = fake look.

    3. Use Motion Instead of Static Frames

    Movement hides imperfections.

    4. Don’t Overload Effects

    Less is more in short-form content.


    Common Mistakes Beginners Make

    Mistake 1: Poor Lighting in Original Footage

    AI struggles with dark or noisy footage.

    Mistake 2: Overusing Cutout on Complex Backgrounds

    Crowded scenes reduce accuracy.

    Mistake 3: Ignoring Color Matching

    Foreground and background must feel unified.

    Mistake 4: Over-editing Edges

    This creates unnatural outlines.

    Even small mistakes can kill immersion.


    Why AI Background Removal Works So Well in 2026

    AI has evolved from basic masking to:

    • Real-time segmentation
    • Depth mapping
    • Motion-aware tracking
    • Semantic subject detection

    This means CapCut can now understand what is a person and what is background with high accuracy.

    That’s why creators can now remove video background in CapCut without green screen and still get professional results.


    Where vfxcut.xyz Comes In

    At vfxcut.xyz, we break down real-world VFX workflows used by viral creators.

    You’ll learn:

    • AI-powered editing systems
    • Keyframing secrets
    • Color grading for retention
    • Short-form storytelling structures

    This isn’t theory—it’s what actually works in 2026.


    Final Thoughts

    Removing backgrounds without a green screen used to be a high-end VFX task.

    Now, it’s a mobile feature.

    But here’s the truth most creators miss:

    The tool doesn’t make the video viral. The execution does.

    If you understand lighting, motion, and timing, you can turn a simple clip into a cinematic short-form masterpiece.


    CTA

    Try this workflow in your next edit. Experiment with AI cutouts, test different backgrounds, and push your creative limits.

    Then explore more advanced breakdowns, VFX techniques, and viral editing systems on vfxcut.xyz, your ultimate hub for short-form creators and VFX enthusiasts.

    Now go create something that looks impossible—but isn’t.

  • Why Keyframes Matter in 2026 Short-Form Content

    Why Keyframes Matter in 2026 Short-Form Content

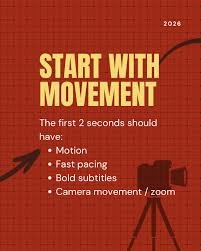
    Platforms like TikTok, Instagram Reels, and YouTube Shorts are now driven by motion psychology.

    Static videos = low retention
    Dynamic motion = high retention

    Keyframes allow you to control:

    • Position animation
    • Scale (zoom in/out)
    • Rotation movement
    • Opacity transitions
    • Layer-based motion timing

    This is the core of modern storytelling.

    Even AI tools like CapCut rely heavily on keyframe automation under the hood.


    Tools Used in Modern Keyframe Workflows (2026)

    Professional editors no longer rely on manual motion alone.

    They combine:

    • CapCut → Mobile keyframing + AI-assisted motion
    • Runway ML → AI-generated motion elements
    • Sora → Cinematic scene generation
    • Adobe Premiere Pro → Advanced motion graphics control

    But for beginners, CapCut is the fastest learning environment.


    CapCut vs Premiere Pro (Keyframe Workflow Comparison)

    FeatureCapCutPremiere Pro
    Keyframe ControlSimple + visualAdvanced precision
    Learning CurveBeginner friendlyProfessional level
    Speed of EditingVery fastSlower workflow
    AI AssistanceBuilt-in motion toolsLimited AI support
    Best Use CaseViral short-form contentFilm & commercial work

    If your goal is virality, CapCut is more than enough.


    Step-by-Step CapCut Keyframe Animation Tutorial for Beginners

    Now let’s build real motion effects step by step.


    Step 1: Import Your Footage

    Open CapCut and import your clip.

    Best practice checklist:

    • Use high resolution footage (1080p or 4K)
    • Ensure stable lighting
    • Keep subject clearly visible
    • Avoid excessive motion blur

    Clean footage = smoother animation results.


    Step 2: Understand the Keyframe Button

    In CapCut, the keyframe icon looks like a small diamond.

    You will use it to:

    • Mark start point
    • Define end movement
    • Create motion between frames

    Think of keyframes as “motion anchors.”

    Here is the real talk about high-retention editing: motion timing matters more than complexity.


    Step 3: Create Basic Zoom Animation (Scale Keyframe)

    This is the foundation of all viral edits.

    Steps:

    1. Place playhead at starting point
    2. Click keyframe (diamond icon)
    3. Move to later point in timeline
    4. Increase scale (e.g., 100% → 120%)

    Result:
    Smooth zoom-in effect that increases focus and engagement.


    Step 4: Add Position Movement (Floating Effect)

    Now we create motion depth.

    Steps:

    • Set keyframe at start position
    • Move playhead forward
    • Drag subject slightly left/right or up/down

    This creates:

    • Floating camera illusion
    • Dynamic framing
    • More cinematic feel

    Pro tip: Small movements look more realistic than large ones.


    Step 5: Combine Scale + Position (Cinematic Motion)

    This is where beginners become intermediate editors.

    Combine:

    • Slow zoom in
    • Slight vertical movement
    • Gentle horizontal shift

    This creates a “handheld cinematic feel” often used in viral reels.


    Step 6: Add Rotation Keyframes (Advanced Trick)

    Rotation adds energy.

    Steps:

    • Add keyframe at start
    • Move forward
    • Rotate 1–3 degrees only

    Warning: too much rotation destroys realism instantly.


    Step 7: Timing Keyframes with Beat Drops

    This is where retention spikes happen.

    Match keyframes with:

    • Music beats
    • Sound effects
    • Transition hits

    Even simple edits become viral when motion syncs with audio rhythm.


    Step 8: Layer Keyframes with Text & Effects

    Now combine motion layers:

    • Text zoom-in animations
    • Sticker movement
    • Overlay transitions
    • Light leaks or glow effects

    Each layer should have its own keyframe timing.


    Step 9: AI-Assisted Motion Enhancement (2026 Upgrade)

    Modern CapCut now includes AI motion assistance:

    • Smart motion smoothing
    • Auto velocity adjustment
    • Predictive animation flow
    • Subject tracking stabilization

    Combine this with tools like Sora to generate full cinematic environments with natural motion flow.


    Pro Keyframe Settings Checklist (2026 Standard)

    Before exporting, check:

    • Smooth motion (no jitter)
    • No abrupt jumps between keyframes
    • Scale changes under 30%
    • Rotation under 3 degrees
    • Motion synced with audio
    • No overlapping conflicting animations

    Common Beginner Mistakes

    Mistake 1: Overusing Keyframes

    Too many keyframes = chaotic motion.

    Mistake 2: Large Movement Jumps

    Creates unnatural “glitchy” motion.

    Mistake 3: Ignoring Timing

    Bad timing kills retention faster than bad visuals.

    Mistake 4: Random Animation Placement

    Motion must support storytelling, not distract from it.

    Even small mistakes can make your edit feel unprofessional.


    Why Keyframes Still Dominate in 2026 (Even With AI)

    Even with advanced AI editing systems, keyframes are still essential because:

    • AI generates motion
    • But editors control storytelling timing

    Keyframes give you:

    • Precision
    • Emotional control
    • Visual rhythm
    • Narrative flow

    This is why every professional editor still uses them daily.


    Where vfxcut.xyz Comes In

    At vfxcut.xyz, we break down real VFX workflows used by viral creators—not theory, but actual production systems.

    You’ll learn:

    • Keyframing systems for retention
    • AI-assisted motion design
    • Color grading for viral performance
    • Short-form storytelling architecture

    This is where beginners become professional-level creators.


    Final Thoughts

    The step-by-step CapCut keyframe animation tutorial for beginners is not just about learning buttons—it’s about learning motion language.

    Once you understand keyframes, every video becomes editable like a story.

    But here’s the truth most beginners miss:

    The tool doesn’t create viral videos. Motion storytelling does.

    If you control timing, scale, and rhythm, even simple footage can look cinematic.


    CTA

    Now it’s your turn.

    Open CapCut, start experimenting with keyframes, and build your first motion-based edit. Focus on smooth transitions, not complexity.

    Then explore more advanced VFX guides, AI editing systems, and viral content strategies on vfxcut.xyz, your ultimate hub for short-form creators and VFX enthusiasts.

    Go create motion that people can’t stop watching.

  • Why Auto Captions Matter in 2026 (Retention Science Explained)

    Why Auto Captions Matter in 2026 (Retention Science Explained)

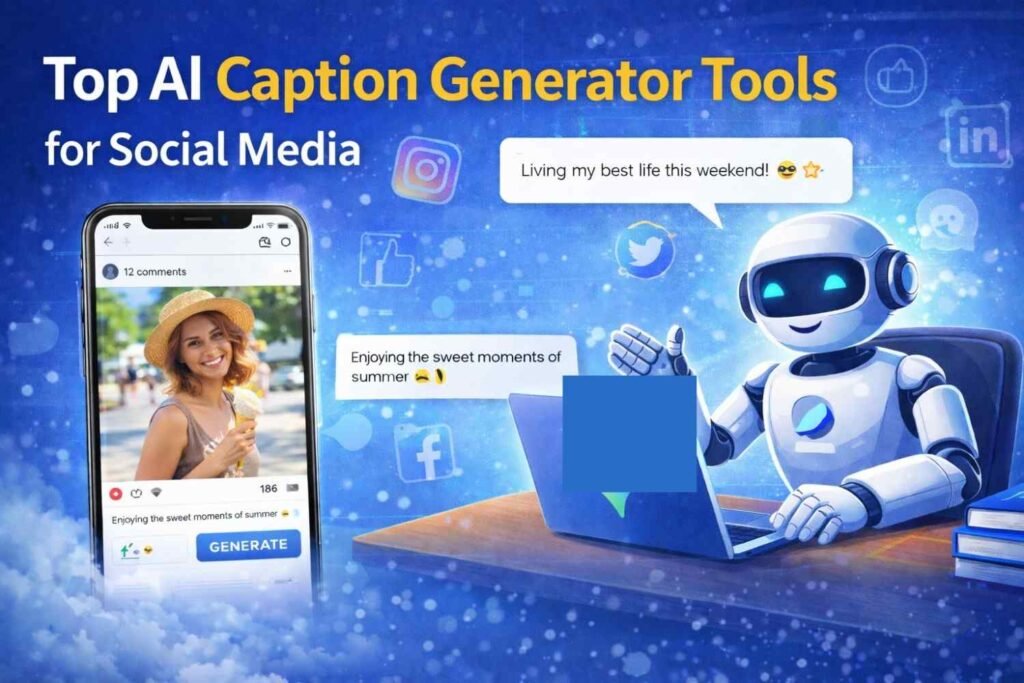
    Modern short-form platforms like TikTok, Instagram Reels, and YouTube Shorts are heavily driven by silent-view behavior.

    Over 70% of users watch videos without sound first.

    That means:

    • No captions = instant scroll away
    • Clear captions = higher watch time
    • Styled captions = stronger engagement loop

    Captions now function as:

    • Visual storytelling layer
    • Attention retention tool
    • Accessibility feature
    • Algorithm signal booster

    In simple terms: captions directly increase your reach.


    Tools Used for Auto Captions in 2026 Workflow

    Professional editors now rely on AI-powered transcription systems.

    Here’s the standard stack:

    • CapCut PC → Main auto-caption engine (free AI transcription)
    • Runway ML → Advanced AI enhancement for subtitles + visuals
    • Sora → AI cinematic context generation for captions + scenes
    • Adobe Premiere Pro → High-end manual subtitle styling and motion design

    But for most creators, CapCut PC is the fastest and easiest solution.


    CapCut PC vs Premiere Pro (Auto Captions Comparison)

    FeatureCapCut PCPremiere Pro
    Auto CaptionsBuilt-in free AIRequires transcription tools
    SpeedInstant processingSlower workflow
    AccuracyHigh (2026 AI upgrade)Very high (manual refinement)
    Styling OptionsGood preset stylesFully customizable
    Beginner FriendlyExtremely easyProfessional level

    If your goal is fast viral content, CapCut wins again.


    How to Add Auto Captions in CapCut PC for Free (Step-by-Step Guide)

    Now let’s go through the actual workflow like a professional editor would.


    Step 1: Import Your Video

    Open CapCut PC and import your footage.

    Best practice checklist:

    • Clear audio quality
    • Minimal background noise
    • Clean speech (important for AI accuracy)
    • High resolution video (1080p or above)

    Here is the real talk about high-retention editing: bad audio = bad captions.

    AI can only transcribe what it can understand.


    Step 2: Navigate to Auto Captions Tool

    Go to:

    Text → Auto Captions → Generate

    CapCut will:

    • Analyze audio track
    • Convert speech to text using AI
    • Sync captions automatically with timeline

    This is powered by modern speech recognition models trained for multilingual short-form content.


    Step 3: Choose Language Settings

    Set correct language before generating captions.

    Why this matters:

    • Improves accuracy by up to 40%
    • Reduces mis-transcriptions
    • Improves timing alignment

    For example:

    • English (US/UK)
    • Urdu, Hindi, Arabic, etc. depending on content

    Incorrect language selection = messy captions proccess.


    Step 4: Generate and Review Captions

    Once generated, CapCut will automatically place captions on your timeline.

    Now review:

    • Grammar errors
    • Misheard words
    • Timing mismatches

    Even AI in 2026 is not perfect, especially with slang or fast speech.


    Step 5: Style Your Captions for Retention

    This is where viral editing begins.

    Instead of default captions, upgrade them:

    Recommended styling:

    • Bold font (for readability)
    • High contrast colors
    • Highlighted keywords
    • Animated entry effects

    Pro tip: captions should guide the eye, not distract it.


    Step 6: Add Motion to Captions (Advanced Trick)

    Static captions are outdated.

    In CapCut, you can:

    • Animate text pop-ins
    • Add bounce effects
    • Sync captions with beats
    • Use kinetic typography styles

    This creates a “scroll-stopping” effect that increases watch time.


    Step 7: Sync Captions with Keyframes

    Now combine captions with motion editing.

    Use keyframes to:

    • Slightly zoom captions with speech
    • Move captions with subject movement
    • Emphasize emotional words

    This is where editing becomes storytelling.

    If you want to master this deeper, keyframing and caption timing go hand-in-hand.


    Step 8: AI Enhancement Layer (2026 Upgrade System)

    Modern CapCut PC now includes AI upgrades such as:

    • Smart punctuation correction
    • Auto keyword highlighting
    • Speaker detection
    • Timing optimization

    When combined with tools like Runway ML, captions can even be matched with visual scene changes.


    Pro Caption Settings Checklist (2026 Standard)

    Before exporting your video:

    • ✔ Captions synced properly
    • ✔ No spelling errors
    • ✔ Font size readable on mobile
    • ✔ Contrast high enough for visibility
    • ✔ Key words highlighted
    • ✔ No overlapping text blocks
    • ✔ Timing aligned with speech rhythm

    Common Mistakes Beginners Make

    Mistake 1: Using Default Caption Style

    Default captions reduce engagement instantly.

    Mistake 2: Ignoring Timing Errors

    Even 0.3 second delay can feel unnatural.

    Mistake 3: Poor Contrast Design

    If viewers can’t read captions, they scroll away.

    Mistake 4: Overcrowded Text

    Too many words per line reduces readability.

    Even small errors affect retention significantly.


    Why Auto Captions Are Critical in 2026

    AI-driven content platforms now analyze:

    • Watch time
    • Replay rate
    • Caption engagement
    • Silent viewing behavior

    Captions improve all four metrics simultaneously.

    That’s why every viral creator now uses auto subtitles as a default workflow.


    Where vfxcut.xyz Comes In

    At vfxcut.xyz, we break down real-world editing systems used by viral creators—not theory, but actual production workflows.

    You’ll learn:

    • AI editing systems for retention
    • Caption styling for viral growth
    • Keyframing + text animation systems
    • Short-form storytelling structures

    This is where beginners turn into professional editors.


    Final Thoughts

    Learning how to add auto captions in CapCut PC for free is not just about subtitles—it’s about controlling viewer attention.

    Captions guide emotion, timing, and retention.

    But here’s the truth most creators miss:

    The AI doesn’t make your video viral. The way you use it does.

    If you combine captions with motion, timing, and storytelling, even simple clips can become high-performing content.


    CTA

    Try this workflow in your next edit. Experiment with caption styles, test different animations, and analyze how your retention changes.

    Then explore more advanced editing systems, AI workflows, and viral content strategies on vfxcut.xyz, your ultimate hub for short-form creators and VFX enthusiasts.

    Now go turn your words into visuals that people actually stop and read.

  • Why Smooth Slow Motion Matters in 2026 Short-Form Content

    Why Smooth Slow Motion Matters in 2026 Short-Form Content

    Short-form platforms like TikTok, Instagram Reels, and YouTube Shorts are now driven by micro-emotion moments.

    Slow motion is used to:

    • Emphasize emotional beats
    • Highlight action details
    • Create cinematic tension
    • Increase watch time retention
    • Add perceived production value

    But here’s the problem:

    Normal slow motion = frame skipping = visual breakup
    Optical flow slow motion = AI-generated in-between frames = cinematic fluidity

    That difference alone can decide whether your video looks amateur or professional.


    What is Optical Flow in Video Editing?

    Optical flow is an AI-based motion interpolation system that:

    • Analyzes movement between frames
    • Predicts intermediate motion paths
    • Generates artificial frames
    • Smooths out playback at lower speeds

    In simple terms:

    It fills in the missing motion between frames.

    Even tools like CapCut now use optical flow-style AI engines to simulate professional-grade slow motion.


    Tools Used in 2026 Slow Motion Workflow

    Modern editors combine multiple AI systems for best results:

    • CapCut → Optical flow + speed ramping
    • Runway ML → Motion reconstruction and frame enhancement
    • Sora → Cinematic motion synthesis
    • Adobe Premiere Pro → Advanced time remapping and motion graphs

    But for most creators, CapCut is more than enough.


    CapCut vs Premiere Pro (Optical Flow Slow Motion Comparison)

    FeatureCapCutPremiere Pro
    Optical Flow QualityAI-powered (fast)Extremely advanced
    Speed of RenderingVery fastSlower
    Ease of UseBeginner friendlyProfessional workflow
    Motion ControlBasic to mediumFully customizable
    Best ForViral content creatorsFilm & commercial editing

    If your goal is short-form virality, CapCut is the fastest path.


    Creating Smooth Slow Motion in CapCut Using Optical Flow (Step-by-Step Guide)

    Now let’s go into the real workflow.


    Step 1: Import High Frame Rate Footage

    Open CapCut and import your clip.

    Best practice checklist:

    • Shoot at 60fps or 120fps
    • Ensure stable lighting
    • Avoid motion blur in original footage
    • Keep subject movement clear and visible

    Here is the real talk about high-retention editing: optical flow works best when the source footage is clean.


    Step 2: Select Speed Control Tool

    Go to:

    Speed → Normal → Slow Motion

    Now reduce speed to:

    • 0.5x for mild slow motion
    • 0.3x for cinematic effect
    • 0.1x for extreme dramatic slow motion

    But don’t stop here—this is just the base layer.


    Step 3: Enable Optical Flow (Critical Step)

    Inside CapCut speed settings:

    • Turn on “Smooth Slow Motion” or “Optical Flow”

    This activates AI interpolation.

    What happens behind the scenes:

    • AI analyzes frame movement
    • Detects motion vectors
    • Creates synthetic frames
    • Smooths playback transitions

    Without this step, your slow motion will look choppy.


    Step 4: Fine-Tune Motion Smoothness

    Now adjust:

    • Motion smoothing strength
    • Frame interpolation intensity
    • Edge correction (if available)

    Too much smoothing can create a “liquid warping” effect, so balance is key.


    Step 5: Add Speed Ramping for Cinematic Flow

    Speed ramping = transition between normal speed and slow motion.

    Steps:

    • Add keyframes on speed graph
    • Gradually reduce speed into slow motion
    • Hold peak slow motion for impact
    • Return to normal speed smoothly

    This is used heavily in viral edits.


    Step 6: Combine Slow Motion with Keyframes

    Now we integrate motion control.

    Use keyframes to:

    • Slightly zoom in during slow motion
    • Add micro camera shake (very subtle)
    • Shift framing for dynamic composition

    This creates emotional depth.

    Even small motion changes increase retention significantly.


    Step 7: Color Grading for Cinematic Impact

    Slow motion amplifies visual detail, so grading becomes critical.

    Apply:

    • Soft contrast curves
    • Slight desaturation for cinematic tone
    • Warm highlights or cool shadows
    • Film grain for texture

    If color grading is off, slow motion will feel flat.


    Step 8: Enhance with AI Tools (2026 Upgrade Layer)

    Modern editors now enhance slow motion using AI systems like:

    • Motion reconstruction
    • Frame sharpening
    • Detail enhancement
    • Stabilization correction

    Tools like Runway ML can even regenerate missing motion details for ultra-clean results.


    Pro Optical Flow Settings Checklist (2026 Standard)

    Before exporting:

    • ✔ 60fps or higher source footage
    • ✔ Optical flow enabled
    • ✔ No extreme motion blur
    • ✔ Speed under 0.3x for cinematic shots
    • ✔ Smooth speed ramp transitions
    • ✔ Color grading applied before slow motion
    • ✔ Keyframes aligned with motion flow

    Common Mistakes Beginners Make

    Mistake 1: Using Low Frame Rate Footage

    30fps footage produces weak optical flow results.

    Mistake 2: Over-Slowing Clips

    Too slow = artificial warping and ghosting.

    Mistake 3: Ignoring Lighting Conditions

    AI struggles with dark or noisy footage.

    Mistake 4: Skipping Speed Ramping

    Static slow motion feels outdated.

    Even small errors can ruin cinematic quality.


    Why Optical Flow Is Essential in 2026 Editing

    AI motion systems have evolved from simple interpolation to:

    • Predictive motion modeling
    • Depth-aware frame generation
    • Object-based tracking
    • Scene-aware reconstruction

    This means slow motion is no longer just a “filter”—it’s AI-generated motion storytelling.

    That’s why creators can now achieve professional cinematic slow motion directly inside mobile editors like CapCut.


    Where vfxcut.xyz Comes In

    At vfxcut.xyz, we break down real VFX workflows used by viral creators—not theory, but actual production systems that drive engagement.

    You’ll learn:

    • Optical flow editing systems
    • Keyframing for motion storytelling
    • Color grading for retention
    • AI-enhanced short-form workflows

    This is where basic editors become cinematic creators.


    Final Thoughts

    Creating smooth slow motion in CapCut using optical flow is not just about slowing down footage—it’s about controlling emotion, timing, and viewer attention.

    Slow motion done correctly can:

    • Increase retention
    • Enhance storytelling
    • Improve cinematic feel
    • Boost algorithm performance

    But here’s the truth most beginners miss:

    It’s not the slow motion that makes videos viral. It’s how and when you use it.

    If you master timing, motion flow, and color grading, even simple clips become cinematic moments.


    CTA

    Now it’s your turn.

    Open CapCut, enable optical flow, and start experimenting with cinematic slow motion. Focus on smooth transitions and emotional timing.

    Then explore more advanced VFX breakdowns, AI editing workflows, and viral content strategies on vfxcut.xyz, your ultimate hub for short-form creators and VFX enthusiasts.

  • Why Videos Become Blurry on Instagram Reels (2026 Breakdown)

    Why Videos Become Blurry on Instagram Reels (2026 Breakdown)

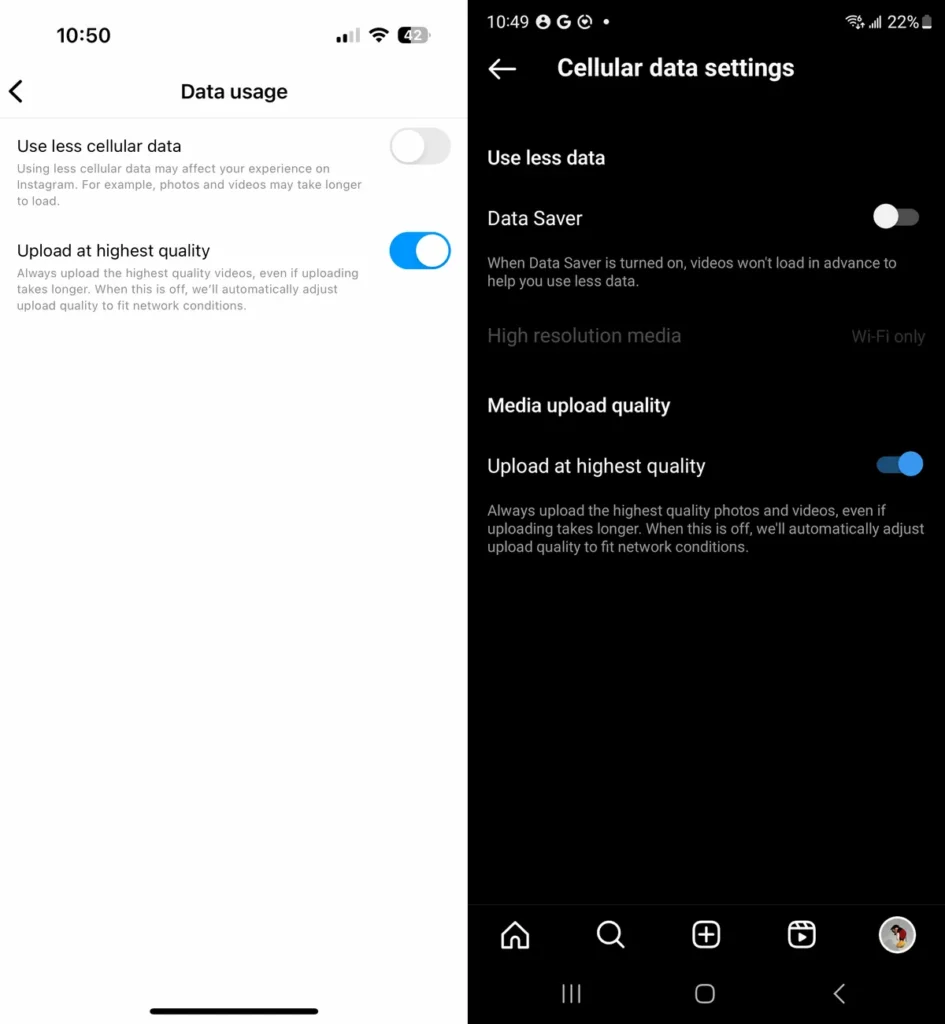
    Instagram Reels applies heavy compression after upload.

    That means your video goes through:

    • Resolution downscaling
    • Bitrate compression
    • Color subsampling
    • Sharpness reduction

    Even if your edit is perfect, Instagram still “reprocesses” it.

    So your goal is not just editing—it’s pre-compensating for compression loss.


    Core Causes of Blurry Videos in CapCut

    Before fixing the problem, you need to understand it:

    1. Low Export Bitrate

    Low bitrate = lost detail.

    2. Incorrect Resolution Settings

    Uploading non-standard resolutions causes downscaling.

    3. Motion Blur in Source Footage

    Already-blurry footage gets worse after compression.

    4. Over-Editing (Too Many Effects)

    Heavy effects degrade clarity.

    5. Poor Sharpening Workflow

    Wrong sharpening creates artifacts instead of clarity.

    Here is the real talk about high-retention editing: clarity is not added at the end—it is preserved from the beginning.


    Tools Used for Fixing Blurry Videos (2026 Workflow)

    Modern editors use AI-assisted enhancement systems:

    • CapCut → Base editing + sharpening tools
    • Runway ML → AI upscaling and detail reconstruction
    • Sora → AI scene clarity and enhancement
    • Adobe Premiere Pro → Advanced export control and color optimization

    But for most creators, CapCut alone is powerful enough.


    CapCut vs Premiere Pro (Clarity & Export Control)

    FeatureCapCutPremiere Pro
    Export ControlSimple presetsAdvanced bitrate tuning
    AI SharpeningBuilt-in AI toolsManual plugins
    Ease of UseBeginner friendlyProfessional workflow
    SpeedFast exportsSlower but precise
    Best ForReels/TikTok creatorsFilm & commercial editors

    For Instagram Reels, speed + optimization matters more than complexity.


    How to Fix Blurry Videos in CapCut for Instagram Reels (Step-by-Step Guide)

    Now let’s fix it properly like a professional editor.


    Step 1: Set Correct Project Resolution

    Open CapCut and set:

    • 1080×1920 (9:16 aspect ratio)
    • 30fps or 60fps depending on source
    • Avoid mixed resolution timelines

    If your timeline is wrong, everything downstream becomes blurry.


    Step 2: Use High-Quality Source Footage

    This is the foundation.

    Checklist:

    • Record in 1080p or 4K
    • Avoid digital zoom
    • Use good lighting
    • Minimize noise

    Even AI cannot fully recover bad footage.


    Step 3: Enable AI Sharpening (CapCut 2026 Feature)

    Go to:

    Enhance → AI Sharpen

    Adjust:

    • Strength: 20–40%
    • Avoid max sharpening (creates halos)

    This step restores lost micro-detail before export.


    Step 4: Apply Detail Recovery Filters

    Inside CapCut:

    • Increase clarity slightly
    • Boost mid-tone contrast
    • Add subtle texture enhancement

    But don’t overdo it—over-sharpening causes compression artifacts.


    Step 5: Color Grade Before Export

    Color plays a huge role in perceived sharpness.

    Apply:

    • Slight contrast boost
    • Controlled saturation
    • Balanced highlights/shadows

    Sharper contrast = perceived clarity increase.

    Even small adjustments matter.


    Step 6: Optimize Export Settings (Critical Step)

    Now we fix the actual output quality.

    Recommended settings:

    • Resolution: 1080p or 4K
    • Bitrate: High (12–20 Mbps minimum)
    • Format: MP4 (H.264 or H.265)
    • FPS: Match source footage

    Low bitrate is the #1 reason for blurry Reels.


    Step 7: Avoid Instagram Compression Pitfalls

    Instagram reduces quality if:

    • Video is re-uploaded multiple times
    • File size is too low
    • Resolution is non-standard

    Best practice:

    • Export once
    • Upload directly
    • Avoid re-saving from WhatsApp or messaging apps

    Step 8: Use AI Upscaling for Extra Clarity (Advanced Trick)

    If your footage is already slightly soft:

    Use tools like Runway ML to:

    • Upscale resolution
    • Reconstruct fine details
    • Enhance motion sharpness

    This is especially useful for older clips.


    CapCut Clarity Optimization Checklist (2026 Standard)

    Before exporting:

    • ✔ 1080×1920 resolution
    • ✔ High bitrate enabled
    • ✔ AI sharpening applied (not overused)
    • ✔ No unnecessary filters stacked
    • ✔ Color grading balanced
    • ✔ Source footage clean
    • ✔ No re-compression before upload

    Common Mistakes That Cause Blurry Reels

    Mistake 1: Exporting in Low Bitrate

    This destroys fine detail instantly.

    Mistake 2: Overusing Effects

    Too many overlays = compression chaos.

    Mistake 3: Zooming After Recording

    Digital zoom reduces sharpness permanently.

    Mistake 4: Ignoring Lighting

    Bad lighting increases noise, which compression destroys further.

    Even small mistakes lead to big quality loss.


    Why AI Has Changed Video Clarity in 2026

    Modern AI systems now:

    • Reconstruct missing pixels
    • Predict motion detail
    • Enhance edges intelligently
    • Reduce compression artifacts

    This is why tools like Sora and Runway-style models are transforming mobile editing.

    But even with AI, export settings still matter.


    Where vfxcut.xyz Comes In

    At vfxcut.xyz, we break down real-world editing systems used by viral creators—not theory, but actual workflows that improve retention and quality.

    You’ll learn:

    • AI clarity enhancement systems
    • Export optimization for Reels
    • Keyframing for sharp motion
    • Color grading for viral performance

    This is where average edits become professional-grade content.


    Final Thoughts

    Learning how to fix blurry videos in CapCut for Instagram Reels is not just about sharpening—it’s about understanding the full pipeline:

    • Capture
    • Edit
    • Enhance
    • Export
    • Compress (platform-side)

    Most creators only focus on editing, but professionals optimize every stage.

    And here’s the truth:

    You can’t fully control Instagram compression—but you can outsmart it.

    If you export correctly, enhance smartly, and avoid common mistakes, your videos will stay sharp even after upload.


    CTA

    Try this workflow in your next edit. Test different export settings, apply AI sharpening carefully, and compare your results after upload.

    Then explore more advanced editing systems, AI enhancement techniques, and viral short-form strategies on vfxcut.xyz, your ultimate hub for short-form creators and VFX enthusiasts.

    Now go make your content look as sharp as your ideas.

  • Why Velocity Editing Works So Well in Gaming Shorts (2026 Psychology)

    Why Velocity Editing Works So Well in Gaming Shorts (2026 Psychology)

    Gaming content is naturally high-energy, but raw gameplay alone doesn’t go viral anymore.

    Velocity editing works because it:

    • Controls viewer attention through motion shifts
    • Emphasizes key gameplay moments
    • Syncs perfectly with audio beats
    • Creates emotional intensity spikes
    • Increases retention through dynamic pacing

    Simply put:

    Fast moments = excitement
    Slow moments = tension
    Velocity shifts = engagement control

    That’s why every top gaming editor uses it.


    Tools Used in Modern Velocity Editing Workflow

    In 2026, editors combine AI tools with mobile editing software:

    • CapCut → Main velocity + keyframe tool
    • Runway ML → Motion enhancement and AI upscaling
    • Sora → Cinematic motion generation for backgrounds
    • Adobe Premiere Pro → Advanced time remapping for pro workflows

    But 90% of viral gaming edits today are still made in CapCut.


    CapCut vs Premiere Pro (Velocity Editing Comparison)

    FeatureCapCutPremiere Pro
    Velocity ControlKeyframe-based simple controlAdvanced time remapping
    Learning CurveBeginner friendlyProfessional level
    Speed of EditingFast workflowSlower but precise
    AI AssistanceBuilt-in smoothing toolsLimited AI integration
    Best ForGaming Shorts / TikTokFilm & cinematic edits

    If you’re focused on gaming shorts, CapCut is the fastest route to viral results.


    Best CapCut Velocity Edit Tutorial for Gaming Shorts (Step-by-Step Guide)

    Now let’s build a real velocity edit like a professional editor would in a studio workflow.


    Step 1: Import Your Gaming Footage

    Open CapCut and import your gameplay.

    Best practices:

    • Use 60fps or higher gameplay
    • Prefer clean kill clips or highlight moments
    • Avoid laggy or compressed recordings
    • Keep clips short and impactful

    Here is the real talk about high-retention editing: velocity edits only work when your base gameplay is clean and responsive.


    Step 2: Cut Your Clip into Micro Moments

    Velocity editing is not done on long clips.

    Break your footage into:

    • Pre-action (setup)
    • Action peak (kill/move/impact)
    • Post-action (reaction/fade)

    This structure gives you control over pacing.

    Even top editors treat gaming clips like cinematic scenes, not raw footage.


    Step 3: Add Keyframes for Velocity Control

    Now we start the real velocity work.

    In CapCut:

    • Select clip
    • Add keyframes at start, middle, and end

    You will control:

    • Speed changes
    • Zoom levels
    • Motion intensity

    This is the backbone of velocity editing.


    Step 4: Create Slow Motion Impact Zones

    At key moments (kills, hits, transitions):

    • Reduce speed to 0.2x–0.4x
    • Add slight zoom-in using keyframes
    • Hold the frame for impact

    This creates “emotional freeze moments” in gameplay.


    Step 5: Create Fast Motion Transitions

    Between action sequences:

    • Increase speed to 1.5x–3x
    • Add motion blur effect
    • Sync with beat drops

    This creates energy flow between moments.


    Step 6: Sync Velocity with Music Beats

    This is where most beginners fail.

    Match:

    • Slow motion → beat drop pause
    • Fast motion → rhythm buildup
    • Impact frames → bass hits

    If timing is off, the edit feels random instead of cinematic.


    Step 7: Add Smooth Velocity Curves (Pro Trick)

    Instead of hard speed jumps:

    • Use gradual speed ramping
    • Smooth transitions between keyframes
    • Avoid instant speed changes

    This is what separates amateur edits from viral ones.


    Step 8: Enhance with Motion Blur + Shake

    To make velocity feel natural:

    • Add motion blur during fast sections
    • Add subtle camera shake on impact
    • Reduce shake during slow motion

    This creates a “real gameplay intensity” effect.


    Step 9: Apply Color Grading for Gaming Aesthetic

    Velocity edits are visually intense, so grading matters.

    Use:

    • High contrast for clarity
    • Slight saturation boost
    • Shadow sharpening for depth

    Different games require different tones:

    • FPS games → cool tones
    • Battle royale → cinematic warm tones
    • Anime-style games → vibrant neon grading

    Step 10: AI Enhancement (2026 Upgrade Layer)

    Modern CapCut integrates AI tools that help velocity edits:

    • Smart motion smoothing
    • Frame interpolation
    • Auto stabilization
    • Detail enhancement

    Advanced creators combine this with Runway ML to upscale and refine motion flow.


    Pro Velocity Editing Settings Checklist (2026 Standard)

    Before exporting:

    • ✔ 60fps or higher source footage
    • ✔ Clean keyframe transitions
    • ✔ Balanced speed ramps (not abrupt)
    • ✔ Motion blur enabled on fast sections
    • ✔ Color grading applied
    • ✔ Audio sync checked with beats
    • ✔ No excessive zooming or shaking

    Common Mistakes Beginners Make

    Mistake 1: Overusing Slow Motion

    Too much slow motion kills energy.

    Mistake 2: Random Speed Changes

    Velocity must follow rhythm, not chaos.

    Mistake 3: Ignoring Audio Sync

    Bad sync = instant drop in retention.

    Mistake 4: Over-editing Effects

    Too many effects reduce clarity of gameplay.

    Even small mistakes can ruin an otherwise good montage.


    Why Velocity Edits Dominate Gaming Shorts in 2026

    Gaming content algorithms now prioritize:

    • Watch duration
    • Replay rate
    • Emotional spikes
    • Retention consistency

    Velocity editing improves all of these simultaneously.

    It turns simple gameplay into structured storytelling:

    • Setup
    • Tension
    • Impact
    • Reward

    That’s why it consistently goes viral.


    Where vfxcut.xyz Comes In

    At vfxcut.xyz, we break down real-world editing systems used by viral gaming creators—not theory, but actual production workflows.

    You’ll learn:

    • Velocity curve design systems
    • Keyframing for gaming storytelling
    • AI-powered motion enhancement
    • Color grading for retention optimization

    This is where basic editors become high-level creators.


    Final Thoughts

    The best CapCut velocity edit tutorial for gaming shorts is not just about changing speed—it’s about controlling emotion through motion.

    When done correctly, velocity editing can:

    • Turn average gameplay into cinematic content
    • Increase retention dramatically
    • Improve storytelling flow
    • Boost algorithm performance

    But here’s the truth most creators miss:

    It’s not the speed that makes edits viral—it’s the timing behind the speed.

    If you understand rhythm, keyframes, and motion flow, even basic gameplay becomes a viral-worthy short.


    CTA

    Now it’s your turn.

    Open CapCut, pick your best gameplay clip, and start building velocity edits using keyframes and speed ramps. Focus on timing, not complexity.

    Then explore more advanced VFX workflows, AI editing systems, and viral gaming strategies on vfxcut.xyz, your ultimate hub for short-form creators and VFX enthusiasts.

    Go create edits that feel faster than reality.

  • Why Video Overlay + Masking Is Viral in 2026

    Why Video Overlay + Masking Is Viral in 2026

    Short-form platforms now reward visual complexity that still feels smooth and readable.

    Overlay masking works because it allows you to:

    • Combine multiple story layers in one frame
    • Create illusion-based storytelling
    • Build depth and visual hierarchy
    • Increase viewer retention instantly
    • Add cinematic transitions without cuts

    In simple terms:

    Overlay = visual stacking
    Masking = selective visibility control

    Together, they create professional-grade motion design.


    Tools Used for Video Overlay in 2026 Workflow

    Modern editors combine mobile editing with AI enhancement tools:

    • CapCut → Primary overlay + masking tool
    • Runway ML → Advanced background removal and compositing
    • Sora → AI-generated overlay environments
    • Adobe Premiere Pro → High-end professional compositing

    But for Android creators, CapCut is more than enough.


    CapCut vs Premiere Pro (Overlay + Masking Workflow Comparison)

    FeatureCapCut AndroidPremiere Pro
    Masking ToolsAI-assisted + manualAdvanced precision masking
    Overlay ControlSimple layeringComplex compositing system
    Ease of UseBeginner friendlyProfessional level
    SpeedFast mobile workflowSlower desktop workflow
    Best ForReels, TikTok, ShortsFilm + VFX production

    For viral content creators, speed + simplicity matters most.


    How to Overlay Videos in CapCut Android with Masking (Step-by-Step Guide)

    Now let’s build a real professional overlay effect from scratch.


    Step 1: Import Your Base Video

    Open CapCut on Android.

    Import:

    • Your main (background) video
    • Your overlay clip (foreground element)

    Best practice checklist:

    • Use high-resolution footage (1080p minimum)
    • Ensure both clips match frame rate
    • Keep lighting consistent if possible

    Here is the real talk about high-retention editing: clean source footage makes masking 10x easier.


    Step 2: Add Overlay Layer

    Tap:

    Overlay → Add Overlay

    Then:

    • Select second video
    • Place it above the main timeline

    At this stage, both videos are stacked—but not blended yet.


    Step 3: Enter Masking Mode

    Now tap the overlay clip and go to:

    Mask → Choose Shape

    CapCut provides:

    • Rectangle mask
    • Circle mask
    • Linear gradient mask
    • Custom freeform mask

    Each mask controls what part of the overlay is visible.


    Step 4: Apply Basic Masking

    Start simple:

    • Select circle or rectangle mask
    • Position over subject area
    • Adjust size and feathering

    Feathering is critical:

    • Low feather = harsh edges
    • High feather = smooth blend

    Pro tip: 10–25% feather works best for most overlays.


    Step 5: Use Keyframes for Moving Masks

    Static masks look outdated.

    Now add motion:

    • Add keyframe at start
    • Move timeline forward
    • Reposition mask following subject

    This creates:

    • Tracking overlay effect
    • Cinematic movement
    • Professional compositing feel

    Even small motion changes improve realism dramatically.


    Step 6: Blend Overlay with Background

    Now refine visual integration:

    Adjust:

    • Opacity (30–80% depending on effect)
    • Blend modes (Overlay, Screen, Multiply)
    • Contrast and brightness

    This step ensures both layers feel like one scene.


    Step 7: Add AI Background Isolation (2026 Upgrade Trick)

    Modern CapCut AI can now assist masking automatically:

    • Auto subject detection
    • Background removal
    • Edge refinement
    • Motion-aware tracking

    Combine this with Runway ML for even cleaner cutouts if needed.


    Step 8: Add Depth Using Motion Blur + Parallax

    To make overlays cinematic:

    • Add slight motion blur on movement
    • Create slow background shift (parallax effect)
    • Sync movement with camera direction

    This gives illusion of real depth instead of flat layers.


    Step 9: Color Grade Both Layers Together

    This is where most beginners fail.

    Apply:

    • Matching color temperature
    • Unified contrast levels
    • Consistent saturation
    • Subtle film grain

    If colors don’t match, viewers instantly detect fake compositing.


    Step 10: Final Polish with Keyframes + Effects

    Now combine everything:

    • Keyframe zoom on overlay subject
    • Subtle shake on impact frames
    • Light glow or vignette for focus

    This is where your edit starts feeling like a cinematic VFX shot.


    Pro Overlay Masking Checklist (2026 Standard)

    Before exporting:

    • ✔ Overlay correctly aligned
    • ✔ Mask feather smooth (not harsh)
    • ✔ Keyframes synced with motion
    • ✔ Colors matched between layers
    • ✔ No visible edges or cutouts
    • ✔ Motion blur applied where needed
    • ✔ Opacity balanced for realism

    Common Mistakes Beginners Make

    Mistake 1: Harsh Mask Edges

    Unfeathered masks instantly break realism.

    Mistake 2: Static Overlays

    No movement = fake-looking edit.

    Mistake 3: Ignoring Color Matching

    Mismatch destroys immersion.

    Mistake 4: Overusing Effects

    Too many overlays reduce clarity and retention.

    Even small mistakes can make edits look unprofessional.


    Why Masking + Overlay Editing Is So Powerful in 2026

    Modern AI editing systems have made compositing easier, but creativity still matters.

    AI now handles:

    • Background separation
    • Edge detection
    • Motion tracking

    But humans still control:

    • Storytelling
    • Timing
    • Emotional impact
    • Visual rhythm

    That’s why overlay masking is still a core VFX skill.


    Where vfxcut.xyz Comes In

    At vfxcut.xyz, we break down real-world VFX workflows used by viral creators—not theory, but practical editing systems that actually perform on social platforms.

    You’ll learn:

    • Advanced masking techniques
    • AI-assisted compositing workflows
    • Keyframing for motion storytelling
    • Color grading for retention optimization

    This is where basic editors become professional creators.


    Final Thoughts

    Learning how to overlay videos in CapCut Android with masking is not just about stacking clips—it’s about controlling attention, depth, and storytelling inside a single frame.

    When done correctly, masking can:

    • Turn simple videos into cinematic edits
    • Increase viewer retention dramatically
    • Add storytelling depth without extra footage
    • Make mobile edits look professional

    But here’s the truth most creators miss:

    It’s not the overlay that makes the edit powerful—it’s how seamlessly you blend it into the story.

    If you master masking, you master visual storytelling.


    CTA

    Now it’s your turn.

    Open CapCut on Android, start experimenting with overlays and masking, and focus on smooth blending instead of complexity.

    Then explore more advanced VFX workflows, AI editing systems, and viral short-form strategies on vfxcut.xyz, your ultimate hub for short-form creators and VFX enthusiasts.

    Go create edits that don’t just look edited—but feel real.

  • Creating Cinematic Black Bars in CapCut Mobile (2026 Master Guide for Viral Shorts)

    Creating Cinematic Black Bars in CapCut Mobile (2026 Master Guide for Viral Shorts)

    If you’ve ever watched a Netflix-style reel or a cinematic TikTok and thought, “Why does this feel like a movie even though it’s just a phone video?” — the answer is almost always black bars.

    And in 2026, creating cinematic black bars in CapCut mobile has become one of the fastest ways to instantly upgrade your content from “random clip” to “cinematic storytelling.”

    Look, I’ve spent years inside editing suites cutting short-form content, and I can tell you something very simple: black bars don’t improve your footage… they improve perception of your footage.

    Let’s break it down properly like a professional VFX artist.


    Why Cinematic Black Bars Still Dominate in 2026

    Even with AI-generated video tools like Runway-style generators and cinematic models like Sora-level systems, aspect ratio manipulation is still one of the most powerful storytelling tools.

    Black bars help you:

    • Create instant cinematic framing
    • Hide vertical smartphone limitations
    • Increase perceived production value
    • Guide viewer focus to subject
    • Improve emotional storytelling impact

    In short:
    Black bars = instant cinematic authority

    That’s why every viral editor uses them in short-form storytelling.


    Tools Used for Cinematic Formatting in 2026

    Modern creators combine mobile editing with AI-powered cinematic tools:

    • CapCut → Main mobile editing tool
    • Runway ML → AI cinematic backgrounds and framing assistance
    • Sora → Ultra-realistic cinematic environment generation
    • Adobe Premiere Pro → Professional widescreen formatting and export control

    But for mobile creators, CapCut alone is more than enough.


    CapCut vs Premiere Pro (Cinematic Black Bars Workflow)

    FeatureCapCut MobilePremiere Pro
    Black Bars ControlSimple overlays or canvas adjustAdvanced aspect ratio control
    Ease of UseBeginner friendlyProfessional workflow
    SpeedInstant editingSlower but precise
    CustomizationLimited but effectiveFully customizable cinematic formats
    Best ForTikTok/Reels creatorsFilm & commercial editors

    If your goal is viral content, CapCut wins on speed and simplicity.


    How Creating Cinematic Black Bars in CapCut Mobile Actually Works

    Before jumping into steps, understand the concept:

    Black bars are not just decoration.

    They are:

    • Aspect ratio manipulation
    • Visual compression technique
    • Focus framing system

    They simulate:

    • 2.35:1 cinema ratio
    • Letterbox framing
    • Filmic composition structure

    Now let’s build it properly.


    Step-by-Step: Creating Cinematic Black Bars in CapCut Mobile

    Now I’ll walk you through the exact professional workflow.


    Step 1: Import Your Footage

    Open CapCut and import your clip.

    Best practices:

    • Use 1080p or higher footage
    • Ensure subject is centered
    • Avoid extreme cropping during shooting
    • Prefer stable footage for cinematic feel

    Here is the real talk about high-retention editing: black bars cannot fix bad framing — they only enhance good composition.


    Step 2: Set Your Base Canvas Ratio

    Go to:

    Format / Ratio Settings

    Choose:

    • 16:9 for cinematic widescreen base
      OR
    • 9:16 for TikTok/Reels vertical cinematic framing

    Then prepare your layout.

    Most viral editors use 9:16 + cinematic bars for shorts.


    Step 3: Add Black Bars Overlay

    Now the cinematic transformation begins.

    Method 1 (Simple Overlay):

    • Add “black solid color” overlay
    • Resize to top and bottom edges
    • Duplicate for both sides if needed

    Method 2 (Advanced Canvas Method):

    • Add canvas background
    • Set black color
    • Adjust safe zones

    Both methods work, but overlay gives more control.


    Step 4: Adjust Bar Thickness (Critical Step)

    This is where most beginners go wrong.

    Recommended ratios:

    • Subtle cinematic look → 5–8% height
    • Standard film look → 10–12% height
    • Extreme cinematic drama → 15% max

    Anything more breaks immersion.

    Too thick = amateur look
    Too thin = no cinematic impact


    Step 5: Match Composition to Cinematic Framing

    Now adjust your video position inside the frame:

    • Keep subject aligned on rule of thirds
    • Avoid center-only framing (unless intentional)
    • Use vertical space for movement

    This step transforms black bars from “overlay” into storytelling structure.


    Step 6: Add Subtle Keyframe Motion (Pro Trick)

    Static black bars are good.

    But animated cinematic framing is better.

    Use keyframes to:

    • Slightly zoom in during emotional beats
    • Slowly pan subject within frame
    • Add micro movement for realism

    Even 2–3% movement improves retention dramatically.


    Step 7: Apply Cinematic Color Grading

    Now integrate mood.

    Adjust:

    • Contrast (slightly higher)
    • Saturation (slightly lower for film look)
    • Shadows (deeper blacks)
    • Temperature (cool or warm based on theme)

    Black bars + color grading = true cinematic illusion.


    Step 8: Enhance with AI Cinematic Tools (2026 Upgrade)

    Modern CapCut integrates AI enhancement tools:

    • Smart scene stabilization
    • AI color balancing
    • Motion smoothing
    • Auto subject enhancement

    You can also combine with Runway ML for cinematic background generation or environment replacement.


    Step 9: Add Depth with Motion Blur + Film Grain

    To complete the cinematic illusion:

    • Add subtle motion blur during movement
    • Apply light film grain (5–10%)
    • Avoid over-sharpening

    This mimics real camera behavior.


    Step 10: Export Settings for Cinematic Shorts

    Use these export settings:

    • Resolution: 1080p or 4K
    • FPS: 30 or 60 depending on footage
    • Bitrate: High (15–25 Mbps recommended)
    • Format: MP4 (H.264)

    Proper export ensures black bars don’t distort or compress incorrectly.


    Cinematic Black Bars Settings Checklist (2026 Standard)

    Before posting, verify:

    • ✔ Bars are symmetrical
    • ✔ Thickness is consistent
    • ✔ Subject fits within safe framing zones
    • ✔ No unwanted cropping
    • ✔ Color grading matches mood
    • ✔ Motion feels natural
    • ✔ No visual compression artifacts

    Common Mistakes Beginners Make

    Mistake 1: Overusing Thick Bars

    Too thick = amateur cinematic imitation.

    Mistake 2: Ignoring Composition

    Bars don’t fix bad framing.

    Mistake 3: No Color Grading

    Without grading, cinematic illusion breaks instantly.

    Mistake 4: Static Dead Frames

    No motion = low engagement.

    Even small mistakes reduce perceived quality.


    Why Black Bars Still Work in 2026

    Even with AI-generated cinematic videos, human perception still responds strongly to:

    • Aspect ratio changes
    • Frame compression
    • Visual focus narrowing

    That’s why black bars still dominate short-form cinematic edits.

    They don’t add information — they control attention.

    And attention = retention.


    Where vfxcut.xyz Comes In

    At vfxcut.xyz, we break down real editing systems used by viral creators—not theory, but actual production workflows.

    You’ll learn:

    • Cinematic framing techniques
    • AI-assisted video editing workflows
    • Keyframing for emotional storytelling
    • Color grading for retention optimization

    This is where mobile editors become cinematic creators.


    Final Thoughts

    Learning creating cinematic black bars in CapCut mobile is not about adding black overlays.

    It’s about understanding how framing controls emotion.

    When used correctly, black bars:

    • Instantly upgrade video quality perception
    • Improve storytelling focus
    • Increase viewer retention
    • Make mobile footage feel cinematic

    But here’s the truth most creators miss:

    Cinematic isn’t about resolution — it’s about intention.


    CTA

    Now it’s your turn.

    Open CapCut mobile, apply cinematic black bars, and start experimenting with framing, motion, and color grading.

    Then explore more advanced VFX workflows, cinematic editing systems, and viral short-form techniques on vfxcut.xyz, your ultimate hub for short-form creators and VFX enthusiasts.

    Go create something that doesn’t just look cinematic… but feels cinematic.