Short-form platforms now reward visual complexity that still feels smooth and readable.
Overlay masking works because it allows you to:
- Combine multiple story layers in one frame
- Create illusion-based storytelling
- Build depth and visual hierarchy
- Increase viewer retention instantly
- Add cinematic transitions without cuts
In simple terms:
Overlay = visual stacking
Masking = selective visibility control
Together, they create professional-grade motion design.
Tools Used for Video Overlay in 2026 Workflow
Modern editors combine mobile editing with AI enhancement tools:
- CapCut → Primary overlay + masking tool
- Runway ML → Advanced background removal and compositing
- Sora → AI-generated overlay environments
- Adobe Premiere Pro → High-end professional compositing
But for Android creators, CapCut is more than enough.
CapCut vs Premiere Pro (Overlay + Masking Workflow Comparison)
| Feature | CapCut Android | Premiere Pro |
|---|---|---|
| Masking Tools | AI-assisted + manual | Advanced precision masking |
| Overlay Control | Simple layering | Complex compositing system |
| Ease of Use | Beginner friendly | Professional level |
| Speed | Fast mobile workflow | Slower desktop workflow |
| Best For | Reels, TikTok, Shorts | Film + VFX production |
For viral content creators, speed + simplicity matters most.
How to Overlay Videos in CapCut Android with Masking (Step-by-Step Guide)
Now let’s build a real professional overlay effect from scratch.
Step 1: Import Your Base Video
Open CapCut on Android.
Import:
- Your main (background) video
- Your overlay clip (foreground element)
Best practice checklist:
- Use high-resolution footage (1080p minimum)
- Ensure both clips match frame rate
- Keep lighting consistent if possible
Here is the real talk about high-retention editing: clean source footage makes masking 10x easier.
Step 2: Add Overlay Layer
Tap:
Overlay → Add Overlay
Then:
- Select second video
- Place it above the main timeline
At this stage, both videos are stacked—but not blended yet.
Step 3: Enter Masking Mode
Now tap the overlay clip and go to:
Mask → Choose Shape
CapCut provides:
- Rectangle mask
- Circle mask
- Linear gradient mask
- Custom freeform mask
Each mask controls what part of the overlay is visible.
Step 4: Apply Basic Masking
Start simple:
- Select circle or rectangle mask
- Position over subject area
- Adjust size and feathering
Feathering is critical:
- Low feather = harsh edges
- High feather = smooth blend
Pro tip: 10–25% feather works best for most overlays.
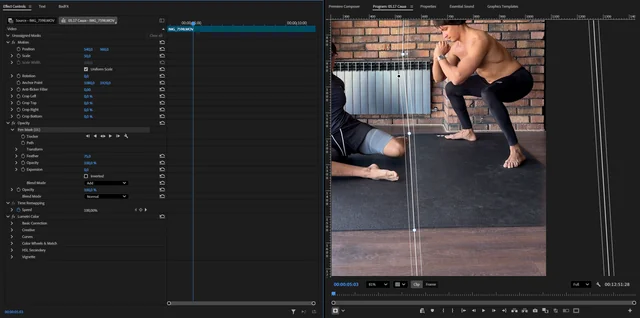
Step 5: Use Keyframes for Moving Masks
Static masks look outdated.
Now add motion:
- Add keyframe at start
- Move timeline forward
- Reposition mask following subject
This creates:
- Tracking overlay effect
- Cinematic movement
- Professional compositing feel
Even small motion changes improve realism dramatically.
Step 6: Blend Overlay with Background
Now refine visual integration:
Adjust:
- Opacity (30–80% depending on effect)
- Blend modes (Overlay, Screen, Multiply)
- Contrast and brightness
This step ensures both layers feel like one scene.
Step 7: Add AI Background Isolation (2026 Upgrade Trick)
Modern CapCut AI can now assist masking automatically:
- Auto subject detection
- Background removal
- Edge refinement
- Motion-aware tracking
Combine this with Runway ML for even cleaner cutouts if needed.
Step 8: Add Depth Using Motion Blur + Parallax
To make overlays cinematic:
- Add slight motion blur on movement
- Create slow background shift (parallax effect)
- Sync movement with camera direction
This gives illusion of real depth instead of flat layers.
Step 9: Color Grade Both Layers Together
This is where most beginners fail.
Apply:
- Matching color temperature
- Unified contrast levels
- Consistent saturation
- Subtle film grain
If colors don’t match, viewers instantly detect fake compositing.
Step 10: Final Polish with Keyframes + Effects
Now combine everything:
- Keyframe zoom on overlay subject
- Subtle shake on impact frames
- Light glow or vignette for focus
This is where your edit starts feeling like a cinematic VFX shot.
Pro Overlay Masking Checklist (2026 Standard)
Before exporting:
- ✔ Overlay correctly aligned
- ✔ Mask feather smooth (not harsh)
- ✔ Keyframes synced with motion
- ✔ Colors matched between layers
- ✔ No visible edges or cutouts
- ✔ Motion blur applied where needed
- ✔ Opacity balanced for realism
Common Mistakes Beginners Make
Mistake 1: Harsh Mask Edges
Unfeathered masks instantly break realism.
Mistake 2: Static Overlays
No movement = fake-looking edit.
Mistake 3: Ignoring Color Matching
Mismatch destroys immersion.
Mistake 4: Overusing Effects
Too many overlays reduce clarity and retention.
Even small mistakes can make edits look unprofessional.
Why Masking + Overlay Editing Is So Powerful in 2026
Modern AI editing systems have made compositing easier, but creativity still matters.
AI now handles:
- Background separation
- Edge detection
- Motion tracking
But humans still control:
- Storytelling
- Timing
- Emotional impact
- Visual rhythm
That’s why overlay masking is still a core VFX skill.
Where vfxcut.xyz Comes In
At vfxcut.xyz, we break down real-world VFX workflows used by viral creators—not theory, but practical editing systems that actually perform on social platforms.
You’ll learn:
- Advanced masking techniques
- AI-assisted compositing workflows
- Keyframing for motion storytelling
- Color grading for retention optimization
This is where basic editors become professional creators.
Final Thoughts
Learning how to overlay videos in CapCut Android with masking is not just about stacking clips—it’s about controlling attention, depth, and storytelling inside a single frame.
When done correctly, masking can:
- Turn simple videos into cinematic edits
- Increase viewer retention dramatically
- Add storytelling depth without extra footage
- Make mobile edits look professional
But here’s the truth most creators miss:
It’s not the overlay that makes the edit powerful—it’s how seamlessly you blend it into the story.
If you master masking, you master visual storytelling.
CTA
Now it’s your turn.
Open CapCut on Android, start experimenting with overlays and masking, and focus on smooth blending instead of complexity.
Then explore more advanced VFX workflows, AI editing systems, and viral short-form strategies on vfxcut.xyz, your ultimate hub for short-form creators and VFX enthusiasts.
Go create edits that don’t just look edited—but feel real.