Look, I’ve spent hours in the editing suite so you don’t have to—and here’s the truth most travel creators don’t want to hear:
Your footage isn’t the problem. Your transitions are.
You can visit the most insane locations in the world… but if your edits feel slow or disconnected, people scroll.
That’s why mastering how to edit cinematic travel transitions in 1 minute is one of the most valuable skills in 2026.
Here is the real talk about high-retention editing:
Travel videos don’t go viral because of where you go—they go viral because of how smoothly you move between moments.
With tools like CapCut, Runway, and Sora, you can now create cinematic transitions directly on your phone—in under a minute.
And yeah—this is exactly what creators on vfxcut.xyz are doing to build scroll-stopping travel reels.
Why Cinematic Transitions Matter for Travel Content
Travel content is all about:
- Movement
- Exploration
- Discovery
But without smooth transitions:
- Clips feel disconnected
- Story feels broken
- Retention drops
Cinematic transitions:
- Connect locations seamlessly
- Maintain visual flow
- Create immersive storytelling
The Core Principle: Motion Matching
If you remember one thing, remember this:
Motion continuity = cinematic transitions.
This means:
- Camera movement should match
- Direction should stay consistent
- Speed should feel natural
Without this, even the best transitions feel fake.
Best Tools for Fast Travel Editing (2026)
CapCut
- Fast workflow
- Keyframing support
- Built-in motion effects
Runway
- AI transition smoothing
- Scene blending
- Motion analysis
Sora
- Cinematic scene morphing
- Advanced storytelling
Premiere Pro / After Effects
- Full manual control
- Advanced masking and transitions
Comparison Table: Travel Editing Tools
| Tool | Speed | Power | Best For |
|---|---|---|---|
| CapCut | ⭐⭐⭐⭐⭐ | ⭐⭐⭐⭐ | Quick edits |
| Runway | ⭐⭐⭐⭐ | ⭐⭐⭐⭐⭐ | AI transitions |
| Sora | ⭐⭐⭐ | ⭐⭐⭐⭐⭐ | Cinematic scenes |
| Premiere Pro | ⭐⭐⭐ | ⭐⭐⭐⭐⭐ | Pro workflows |
Step-by-Step: How to Edit Cinematic Travel Transitions in 1 Minute
Let’s break down the exact workflow.
Step 1: Choose Matching Clips
Pick clips that share:
- Similar motion
- Matching direction
- Comparable framing
Example:
Walking forward → walking forward in next scene
This is where most beginners fail.
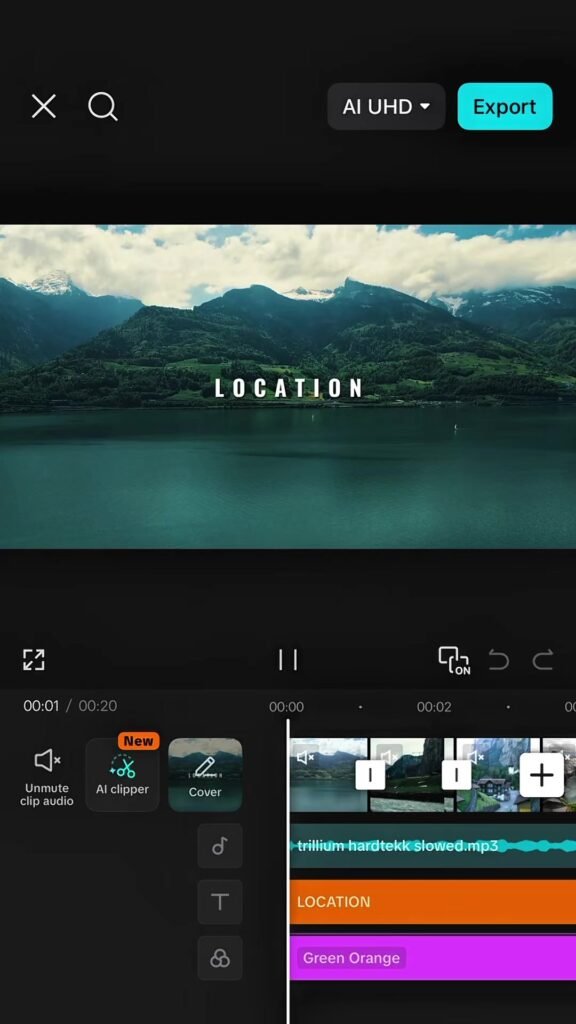
Step 2: Cut at Peak Motion
Inside CapCut:
- Find the moment of strongest motion
- Cut exactly at that frame
This hides the transition.
Step 3: Add Motion Blur
Apply:
- Directional blur
- Quick fade
This smooths the cut instantly.
Step 4: Use Keyframing for Zoom or Pan
Add keyframing to:
- Continue motion across clips
- Enhance flow
- Create cinematic feel
Keep it subtle.
Step 5: Sync with Audio
Transitions should hit:
- Beat drops
- Sound effects
- Music transitions
Audio makes visuals feel intentional.
Step 6: Color Match Clips
Use color grading to:
- Match exposure
- Align tones
- Fix lighting differences
Nothing breaks cinematic flow faster than mismatched colors.
Step 7: Export and Test Loop
Loop your video.
If transitions feel seamless → success.
If not → adjust timing.
Travel Transition Settings Checklist
Before exporting:
- Motion direction matches: ✔
- Cuts at peak movement: ✔
- Keyframing smooth: ✔
- Motion blur applied: ✔
- Audio synced: ✔
- Color grading matched: ✔
- No jarring transitions: ✔
- Loop works cleanly: ✔
Best Cinematic Travel Transitions (2026)
1. Whip Pan Transition
- Fast horizontal movement
- Cut mid-motion
Feels dynamic and natural.
2. Walk-Through Transition
- Walk into frame
- Cut to new location
Creates immersive storytelling.
3. Object Pass Transition
- Object crosses camera
- Cut behind it
Hides transition perfectly.
4. Zoom Transition
- Zoom into subject
- Cut and continue motion
Great for emphasis.
5. AI Morph Transition
Using Runway:
- Blend scenes
- Smooth transitions
- Create seamless visuals
High-Retention Travel Editing Techniques (2026)
1. Micro Transitions Every 2–3 Seconds
Don’t let your video feel static.
Add:
- Small zooms
- Subtle pans
- Quick cuts
2. Invisible Transitions
The best transitions are the ones viewers don’t notice.
Focus on flow—not flash.
3. Speed Ramping
- Speed up before cut
- Slow down after
Creates energy and drama.
4. AI-Assisted Workflow
Use Runway to:
- Enhance motion
- Smooth transitions
- Automate proccess
Common Mistakes (Avoid These)
Let me save your time:
- Cutting without motion match
- Overusing flashy effects
- Ignoring color grading
- Poor timing
Also—don’t force transitions. Let motion guide you.
Advanced Workflow: 1-Minute Cinematic System
Here’s what pro creators do:
- Select clips with matching motion
- Cut at peak action
- Add motion blur
- Enhance with keyframing
- Sync with audio
- Polish with color grading
This system creates cinematic travel edits fast.
Final Thoughts (Creative Mentor Mode)
Look—mastering how to edit cinematic travel transitions in 1 minute isn’t about speed.
It’s about clarity.
Every transition should:
- Feel natural
- Maintain motion
- Increase retention
If your transitions are smooth, your content feels cinematic—even if your shooting on a phone.
And that’s the real advantage in 2026.
Call to Action
Now it’s your turn.
Take your travel clips and create a 1-minute edit using these transition techniques. Focus on motion, timing, and flow.
When you get it right, your videos will instantly feel more professional.
And if you want more pro-level editing breakdowns, workflows, and insider secrets, check out vfxcut.xyz—the ultimate hub for short-form creators and VFX enthusiasts.
Your next viral travel video isn’t about where you go.
It’s about how you move between scenes.