Look, I’ve spent hours in the editing suite so you don’t have to—and if there’s one technique that quietly separates amateur edits from viral-level content in 2026, it’s this:
Using AI to remove unwanted objects from video frames.
We’re talking about removing photobombers, wires, logos, trash, random people—basically anything killing your shot’s aesthetic or storytelling.
And here is the real talk about high-retention editing: clean visuals = higher retention. If your viewer notices distractions, they drop off. If your frame feels intentional and cinematic, they stay.
This guide breaks down everything—from tools like CapCut and Runway to advanced workflows using Sora—so you can remove objects like a pro.
And yes, this is exactly the kind of deep workflow you’ll find on vfxcut.xyz, the go-to hub for serious creators.

Why Object Removal Is a Viral Editing Advantage in 2026
AI object removal isn’t just cleanup—it’s story control.
When you remove distractions:
- Your subject becomes the focus instantly
- Your composition feels intentional
- Your content looks higher-budget
In short-form content, especially TikTok and Reels, every frame matters. Clean visuals boost:
- Watch time
- Loop rate
- Overall retention
Best AI Tools for Removing Objects from Video
CapCut (AI Remove / Retouch)
- One-tap object removal
- Built-in tracking (basic keyframing)
- Fast processing on mobile
- Best for quick social edits
Runway (Inpainting + Motion Tracking)
- Advanced object removal via masking
- Frame-by-frame AI reconstruction
- Better for complex backgrounds
- Cloud-powered rendering
Sora (Next-Gen Scene Regeneration)
- Rebuilds entire scenes with AI
- Removes objects via prompt-based editing
- Insane realism (still evolving)
Adobe After Effects + AI Plugins
- Combines manual masking + AI tools
- High control using keyframing
- Industry-level results
Comparison Table: AI Object Removal Tools
| Tool | Ease of Use | Accuracy | Speed | Best Use Case |
|---|---|---|---|---|
| CapCut AI | ⭐⭐⭐⭐⭐ | ⭐⭐⭐⭐ | Fast | Quick edits |
| Runway | ⭐⭐⭐⭐ | ⭐⭐⭐⭐⭐ | Medium | Pro content |
| Sora | ⭐⭐⭐ | ⭐⭐⭐⭐⭐ | Slow | Cinematic |
| After Effects | ⭐⭐ | ⭐⭐⭐⭐⭐ | Slow | Advanced VFX |
Gear & Footage Optimization (Critical for AI Success)
Before we even touch software—your footage matters more than the tool.
Shoot Like an Editor (Not Just a Creator)
- Keep camera stable (tripod if possible)
- Avoid overlapping objects with subject
- Maintain consistent lighting
- Use higher shutter speeds for clarity
Why This Matters
AI works by predicting missing pixels. If your footage is messy, the AI guesses wrong—and your result looks fake.
Bad input = bad output. No exceptions.
Step-by-Step: Using AI to Remove Unwanted Objects from Video Frames
Let’s break down a CapCut + Runway hybrid workflow—this is what most high-performing creators are using right now.
Step 1: Import Footage into CapCut
- Open CapCut
- Create a new project
- Import your clip
Trim the section where the unwanted object appears. Keep your timeline clean—this helps later.
Step 2: Use AI Remove Tool
- Select your clip
- Go to “AI Tools” → “Remove Object”
- Highlight the unwanted object
CapCut will:
- Track the object
- Replace it using surrounding pixels
- Smooth the area automatically
Quick tip: Don’t over-select. Smaller masks = cleaner results.
Step 3: Refine with Keyframing
This is where most creators mess up.
- Add manual keyframes to adjust mask position
- Track movement frame-by-frame if needed
- Ensure the mask sticks to the object
If you skip this, your edit will drift—and viewers will notice.
Step 4: Export and Enhance in Runway
Now take it up a level.
Upload your clip to Runway and:
- Use inpainting tools
- Refine edges around removed object
- Let AI rebuild missing textures
Runway is especially powerful for:
- Moving backgrounds
- Complex textures (grass, water, crowds)
Step 5: Fix Artifacts with Color Grading
Even if the removal looks good, subtle inconsistencies can break realism.
Match:
- Exposure
- Contrast
- White balance
Use color grading tools to blend everything seamlessly.
Step 6: Add Motion Blur & Noise
Here’s the secret sauce most tutorials skip:
Real footage has imperfections.
Add:
- Motion blur (for moving shots)
- Film grain
- Slight noise
This hides AI artifacts and boosts realism.
Settings Checklist (Save This)
Before exporting, run through this checklist:
- Object fully removed: ✔
- Mask properly tracked: ✔
- Keyframing refined: ✔
- No visible artifacts: ✔
- Color grading matched: ✔
- Motion blur applied: ✔
- Export in 1080p or higher: ✔
High-Retention Editing Techniques (2026 Playbook)
Removing objects is just step one—turn it into a viral asset.
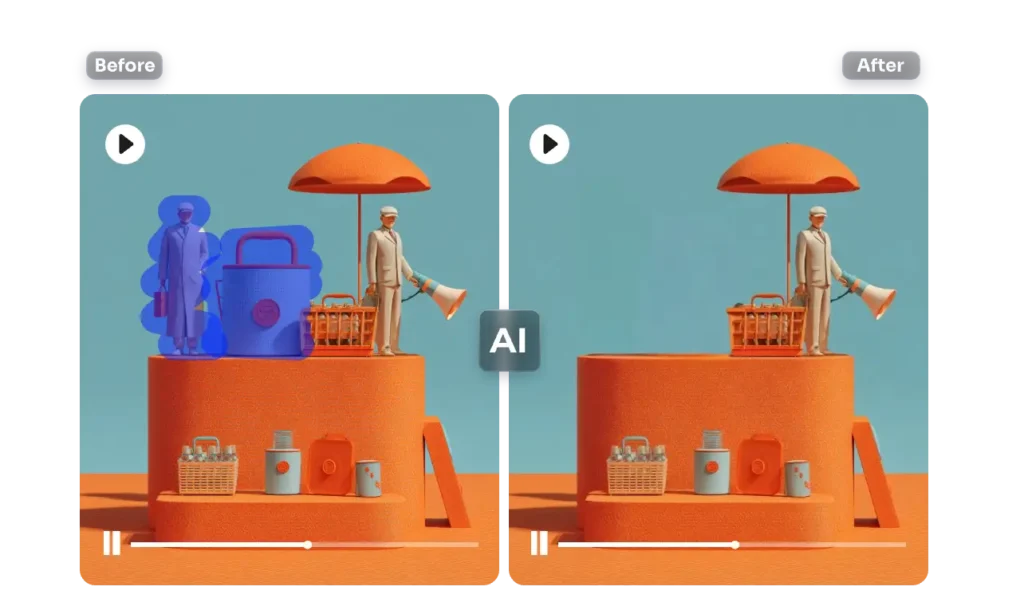
1. Before/After Hook
Start your video with:
- “Watch this…”
- Show original messy frame
- Then reveal clean version
Instant curiosity boost.
2. Use Jump Cuts
- Cut between raw and edited shots
- Keep pacing tight
- Maintain visual energy
3. Add Sound Design
Don’t ignore audio.
Use:
- Whooshes for transitions
- Subtle ambient sounds
- Impact hits for reveals
4. Loop the Final Shot
Loopable edits increase watch time massively.
Make the end match the beginning.
Common Mistakes (Avoid These)
Let me save your time:
- Overusing AI without manual fixes
- Ignoring lighting mismatches
- Using large masks (causes blur)
- Skipping color grading
Also—don’t rush the proccess. Clean edits take time.
Advanced Workflow: Sora for Scene Reconstruction
For next-level creators:
Use Sora to:
- Regenerate entire scenes
- Remove objects via prompts
- Rebuild backgrounds realistically
Example prompt:
“Remove foreground object and reconstruct background with natural lighting, cinematic quality”
This is the future of AI editting—and it’s only getting better.
Final Thoughts (Creative Mentor Mode)
Look—using AI to remove unwanted objects from video frames is no longer optional. It’s a core skill.
The creators who win in 2026 aren’t just shooting content—they’re perfecting every frame.
And the difference between a scroll-past video and a viral one?
Tiny details your audience doesn’t even consciously notice.
Master this workflow, and your content will feel cleaner, more intentional, and way more professional—even if your using free tools.
Call to Action
Now it’s your turn.
Open your editing app, take a messy clip, and clean it up using this workflow. Experiment, refine, and push your limits.
When you nail it, share your results—and for more pro-level breakdowns, visit vfxcut.xyz, the ultimate hub for short-form creators and VFX artists.
Your next viral edit is hiding in the details.